Upgrade to the latest version of Portworx Enterprise for continued support. Documentation for the latest version of Portworx Enterprise can be found here.
Install Portworx on Azure Red Hat OpenShift with console plugin
Follow the instructions on this page to install Portworx on Azure Red Hat OpenShift with console plugin.
Prerequisites
- OpenShift 4.12 or higher.
OpenShift cluster deployed on infrastructure that meets the minimum requirements for Portworx.
Logged in to your Azure account through the CLI
Procedure
- Follow the cluster creation tutorial in the Microsoft Azure documentation, including the Get a Red Hat pull secret (optional) section.
- Follow the cluster connection tutorial in the Microsoft Azure documentation.
Find the ARO Service Principal
When deploying Portworx on Azure Red Hat Openshift (ARO), the virtual machines are created in a resource group with a Deny Assignment role that prevents any service principal from accessing virtual machines except the service principal created for the resource group. In this task, you identify the service principal for the resource group that has access, and configure it to pass on the credentials (Azure Client ID, Azure Client Secret, and Tenant ID) via the Portworx cluster spec. Portworx will fetch the px-azure secret object file to authenticate. Perform the following steps from your Azure Web UI:
- Select Virtual Machines from the top navigation menu.
- From the Virtual machines page, select the Resource Group associated with your cluster.
- From the left panel on the Resource group page, select Access control (IAM).
- On the Access control (IAM) subpage of your resource group, select Deny assignments from the toolbar in the center of the page, then select the link under the Name column (this will likely be an autogenerated string of letters and numbers).
- This page shows that all principals are denied access, except for your resource group. Select your resource group’s name.
From the application page, copy and save the following values:
- Name
- Application ID
- Object ID
You will use these to create the
px-azuresecret.From the home page, open the Azure Active Directory page (select All services to see the option). Select App registrations on the left pane, followed by All applications. In the search bar in the center of the page, paste the application name you saved in the previous step and press the enter key. Select the application link that shows in the results to open the next page.
From your application’s page, select Certificates & secrets under Manage from the left pane.
From the Certificates & secrets page, select + New client secret to create a new secret. On the Add a client secret page, provide the description and expiry date of your secret and click Add.
You can see the newly created secret listed on the Client secret subpage. Copy and save the following values of your newly created secret:
- Value
- Secret ID
Create the px-azure secret with Service Principal credentials
Create a secret called px-azure to give Portworx access to Azure APIs by updating the following fields with the associated fields from the service principal you created in the previous section.
   ./oc create secret generic -n portworx px-azure\
   --from-literal=AZURE_TENANT_ID=<tenant> \
   --from-literal=AZURE_CLIENT_ID=<appId> \
  --from-literal=AZURE_CLIENT_SECRET=<value>
secret/px-azure createdAZURE_TENANT_ID: Run theaz logincommand to get this valueAZURE_CLIENT_ID: Provide the Application ID associated with your cluster’s resource group, which you saved in step 6 of the previous sectionAZURE_CLIENT_SECRET: Provide the Value of your secret, which you saved in the step 10 of the previous section
Generate Portworx spec
Navigate to PX-Central and log in, or create an account.
Select Portworx Enterprise from the Product Catalog page.
On the Product Line page, choose any option depending on which license you intend to use, then click Continue to start the spec generator.
For Platform, choose Azure. Select Azure Red Hat OpenShift (ARO) for Distribution Name, then click Save Spec to generate the specs.
Install Portworx Operator using OpenShift UI
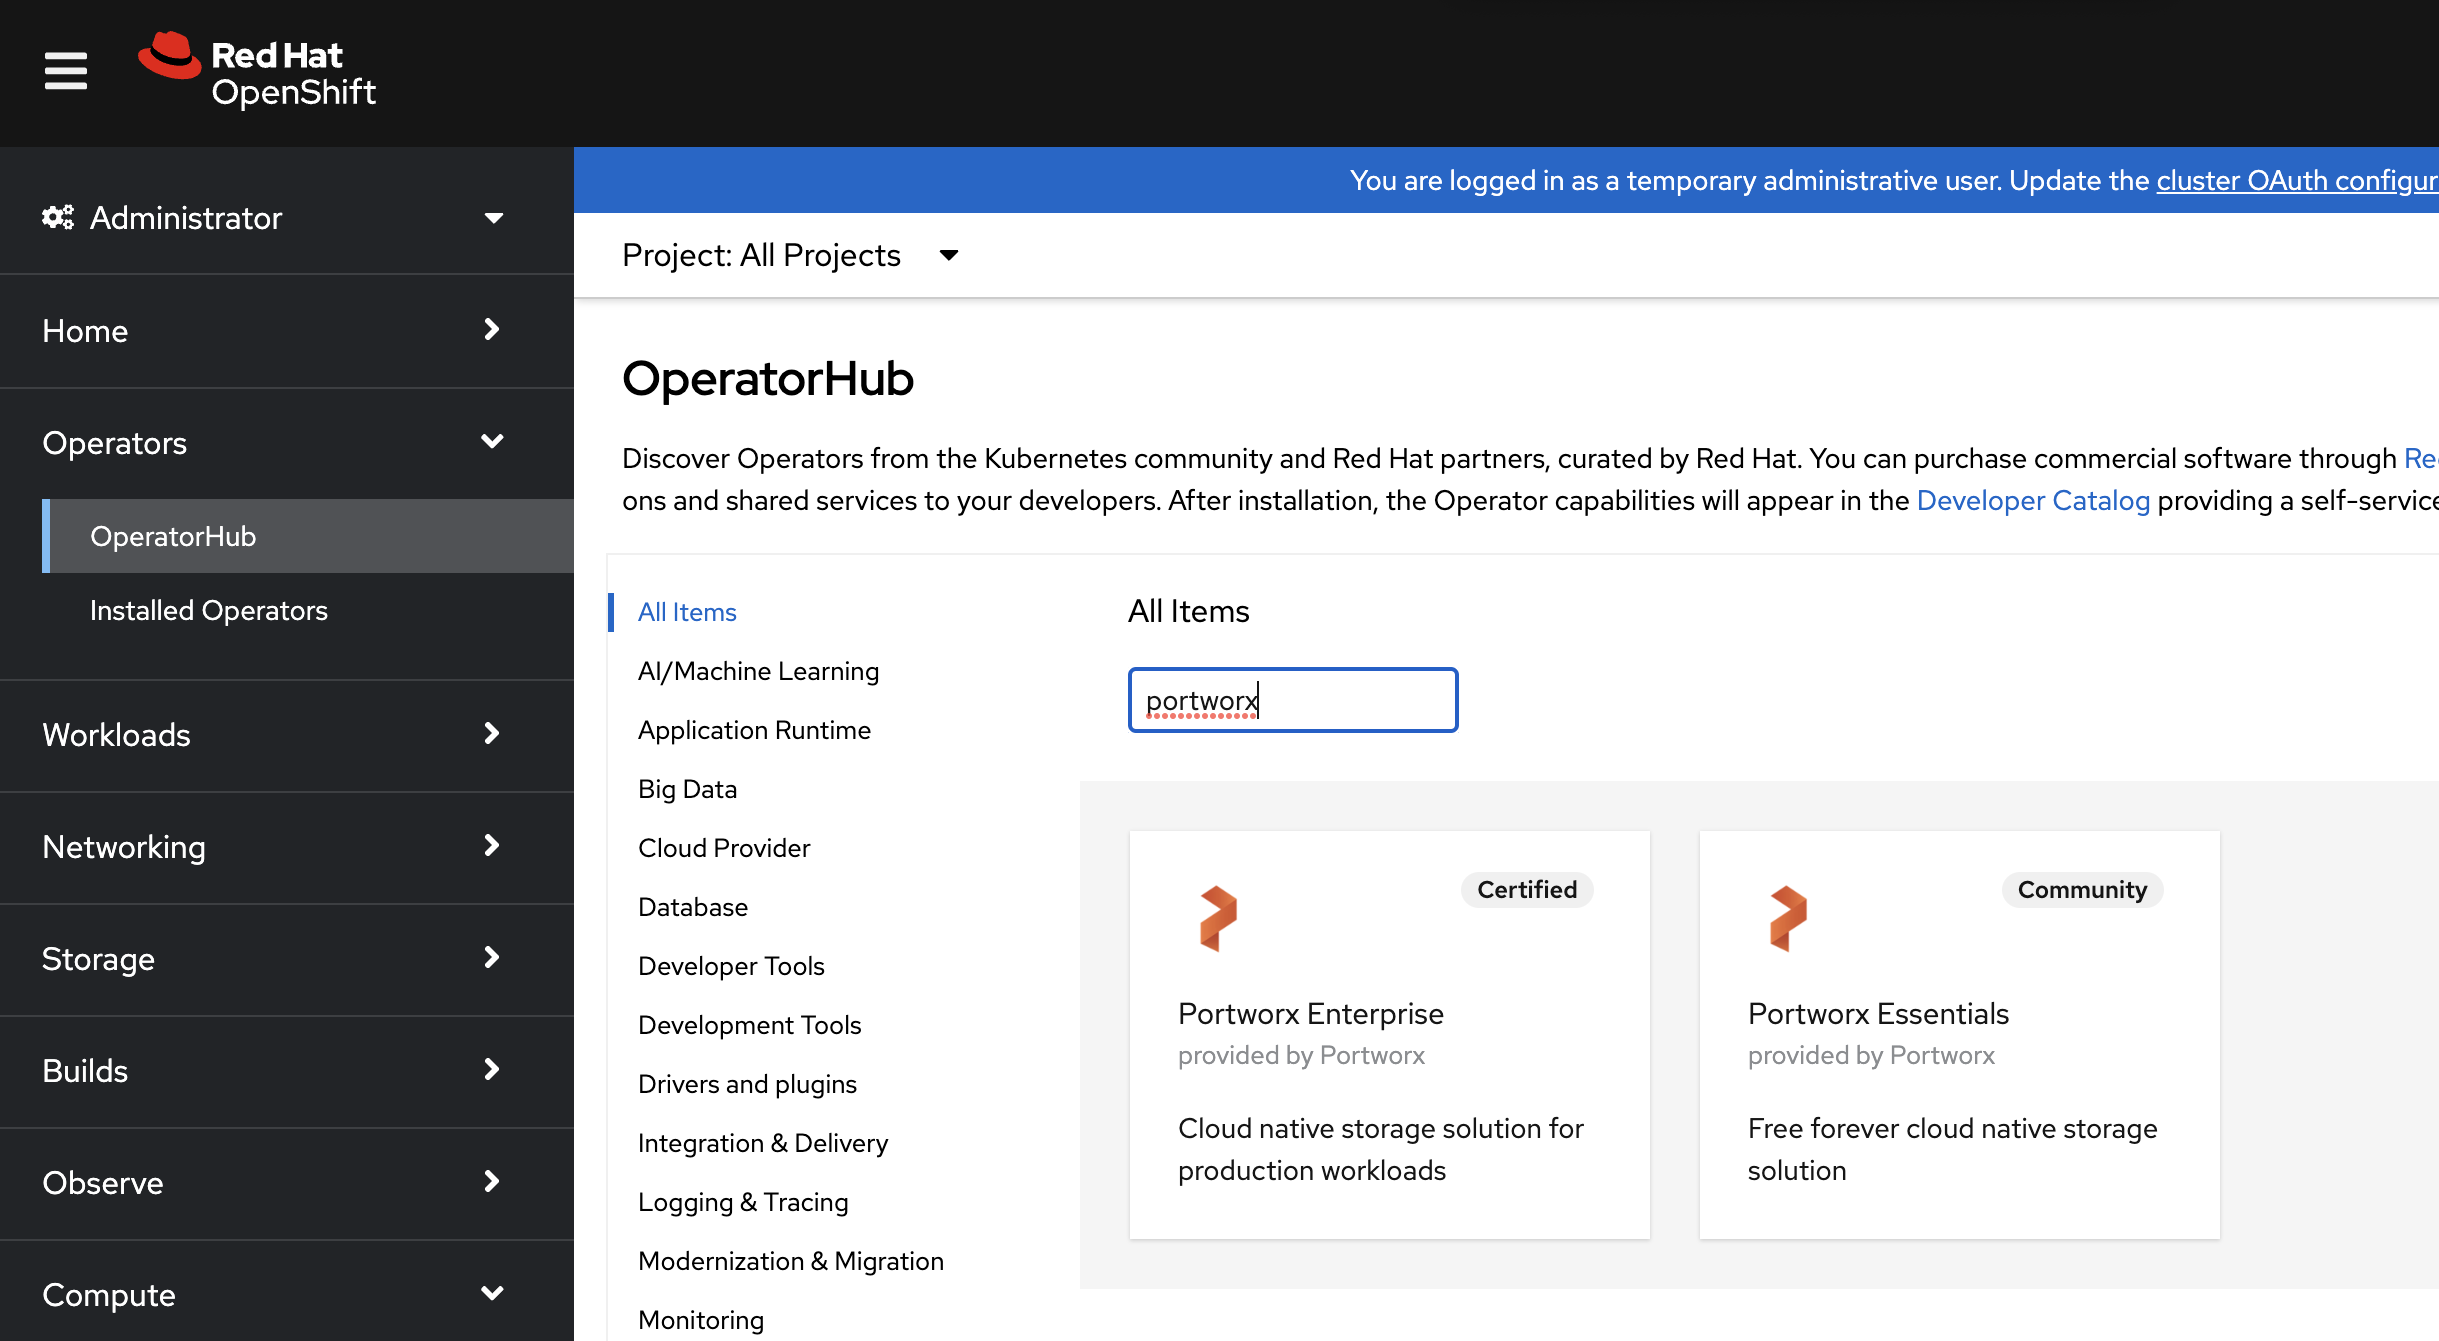
- From your OpenShift UI, select OperatorHub in the left pane.
On the OperatorHub page, search for Portworx and select the Portworx Enterprise or Portworx Essentials card:
Click Install to install Portworx Operator:
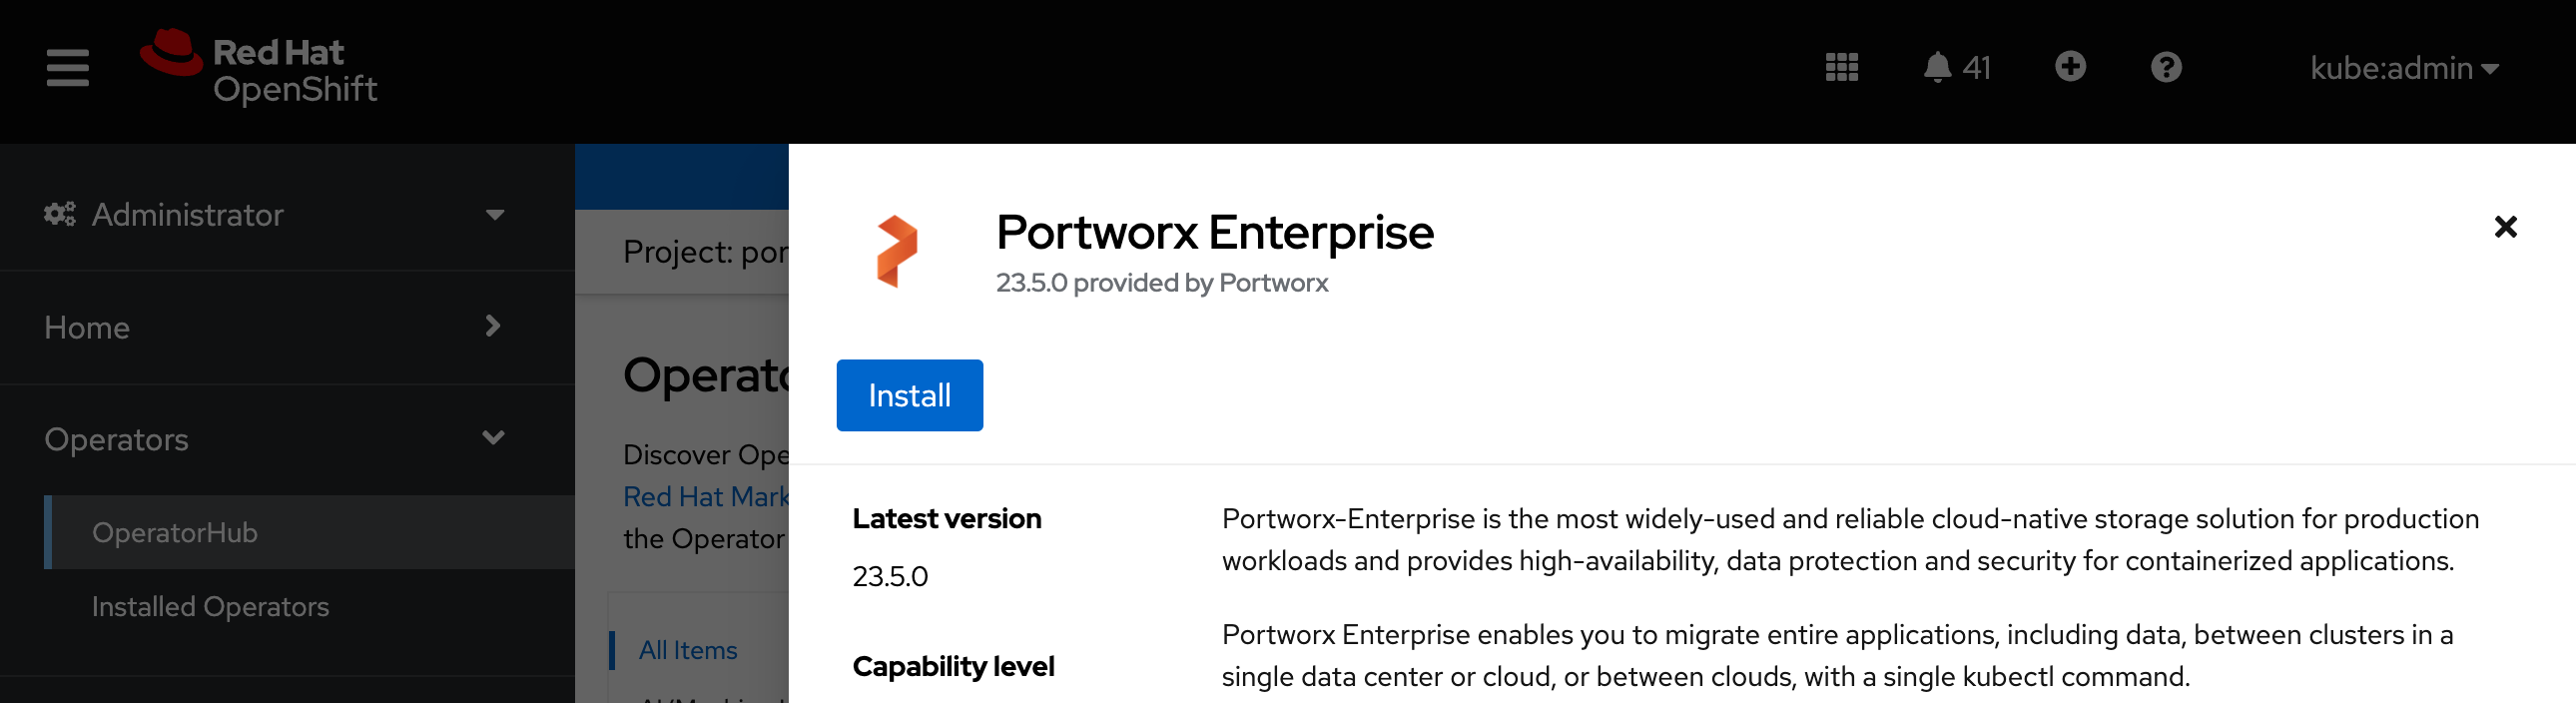
Portworx Operator begins to install and takes you to the Install Operator page. On this page.
- Select the A specific namespace on the cluster option for Installation mode.
- Choose the Create Project option from the Installed Namespace dropdown.
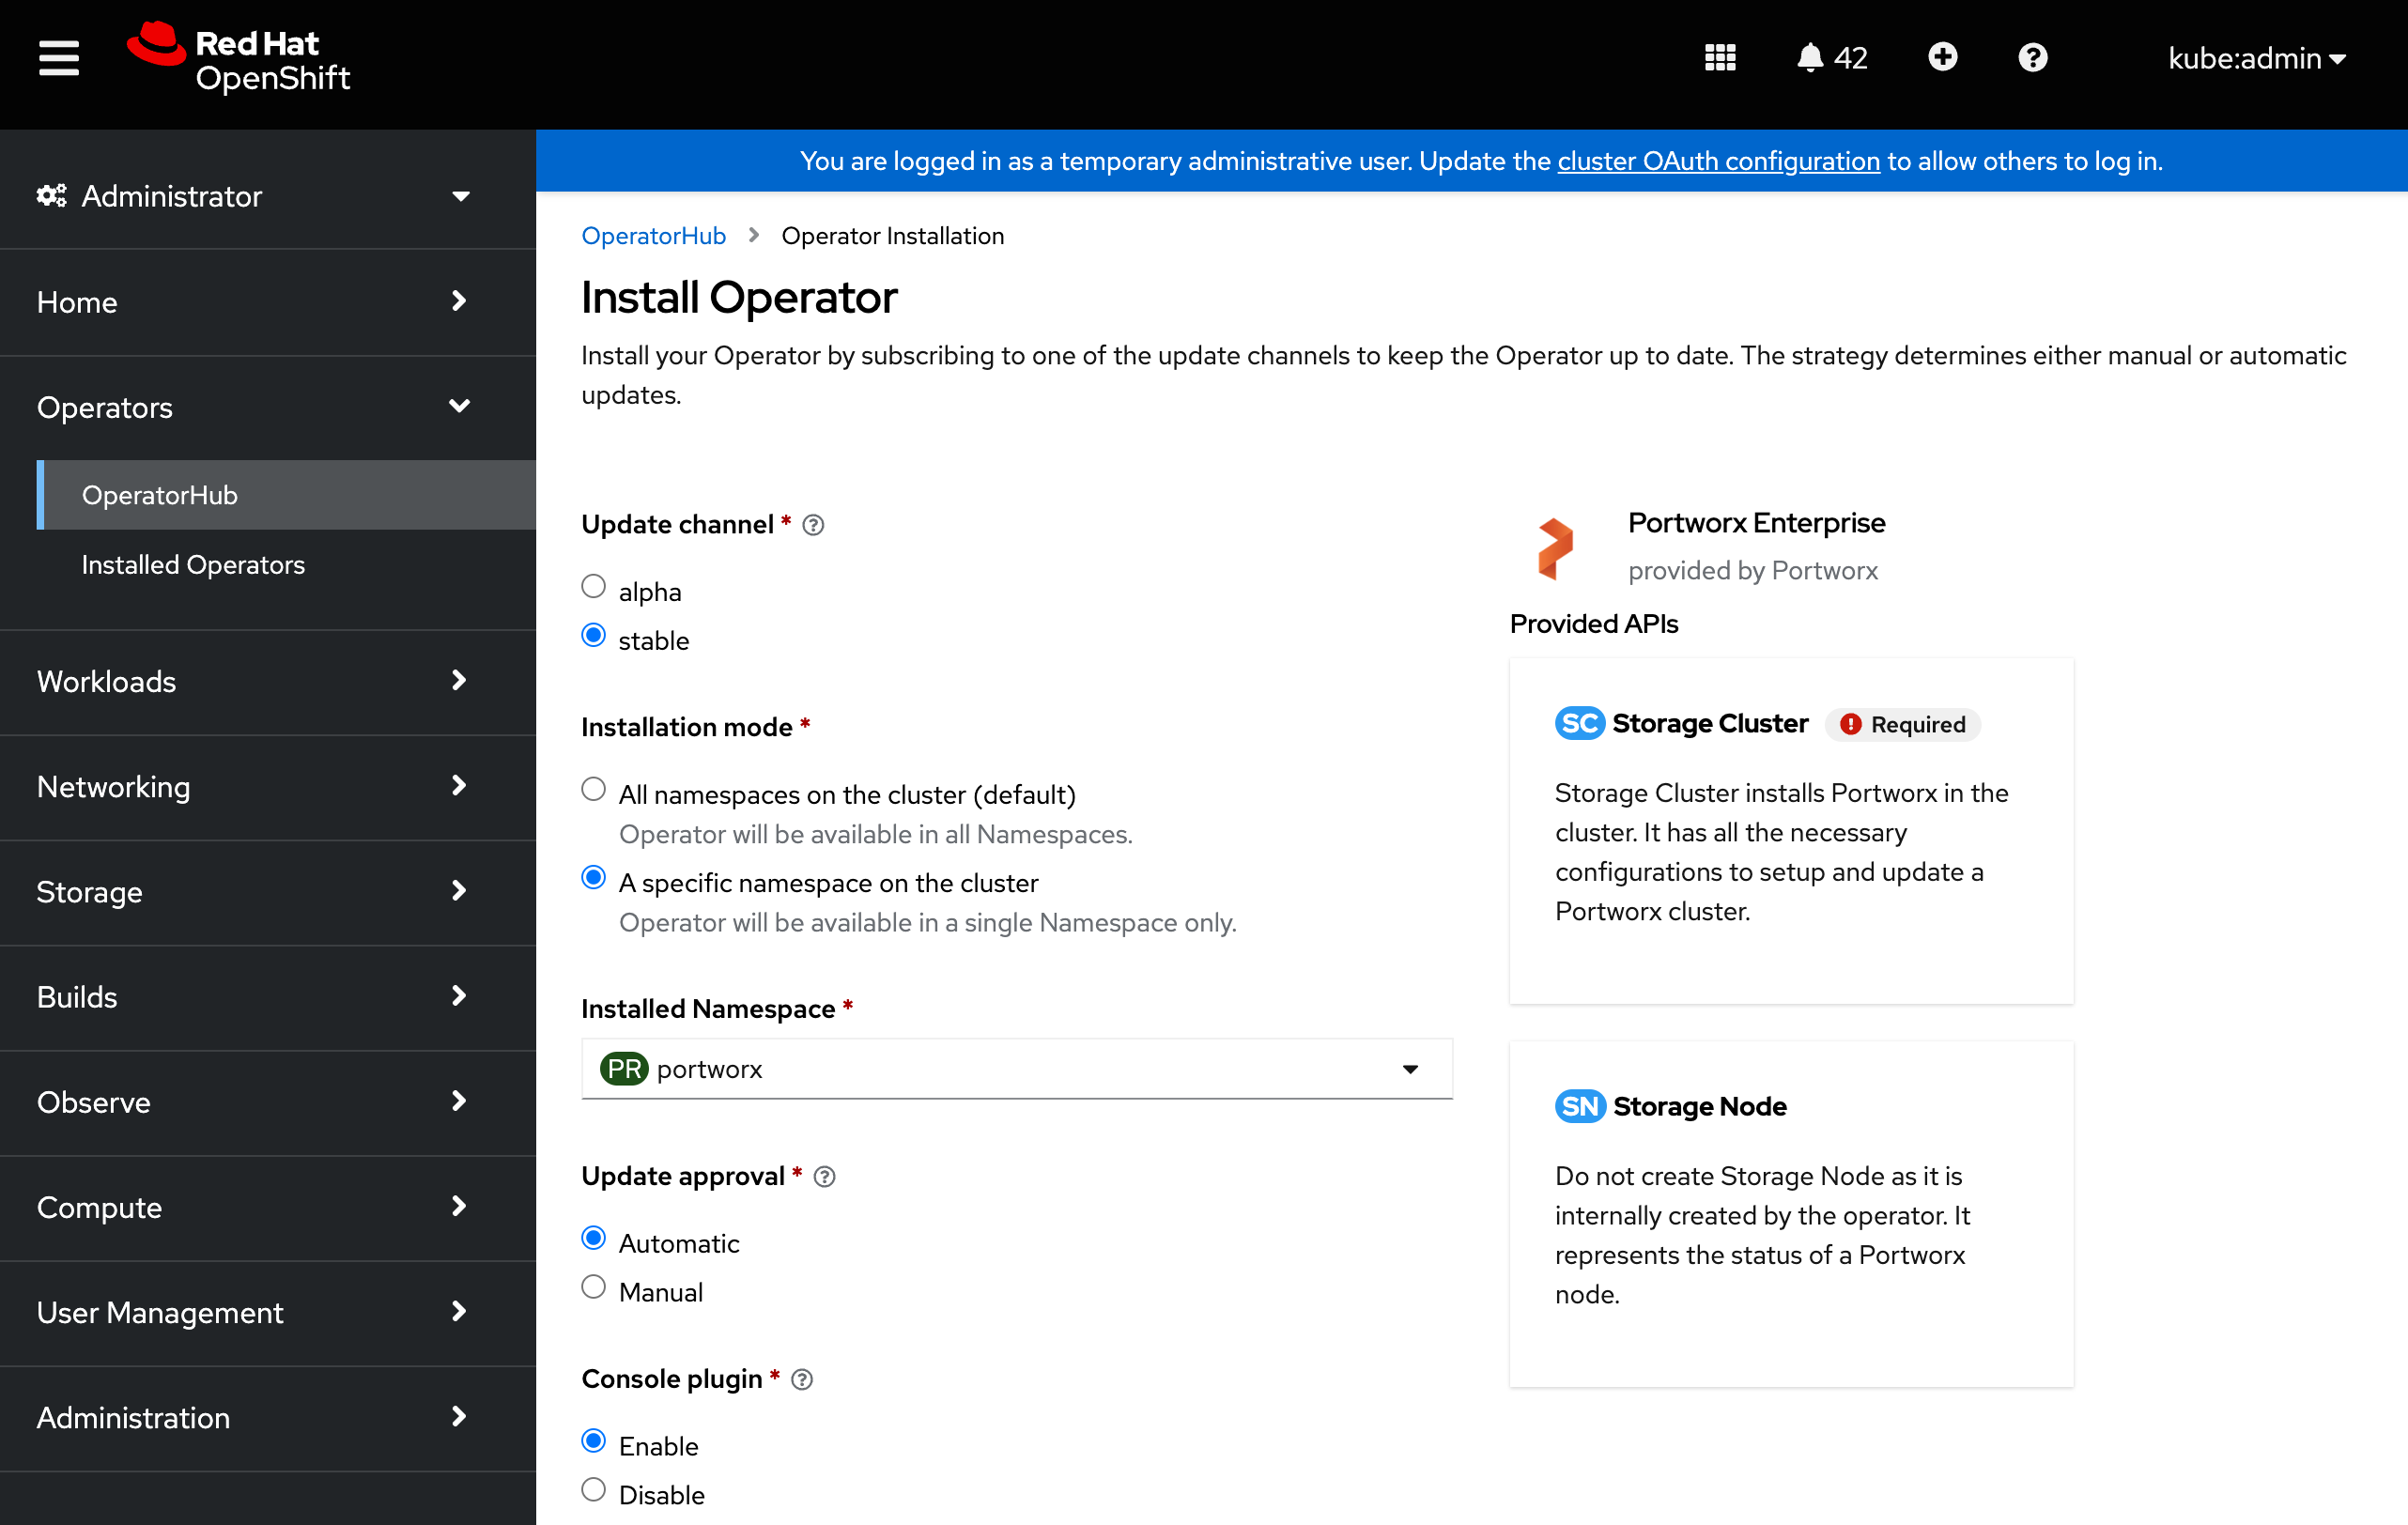
In the Create Project window, provide the name
portworxand click Create to create a namespace called portworx.To manage your Porworx cluster using the Portworx dashboard within the OpenShift UI, select Enable for the Console plugin option.
Click Install to deploy Portworx Operator in the
portworxnamespace.
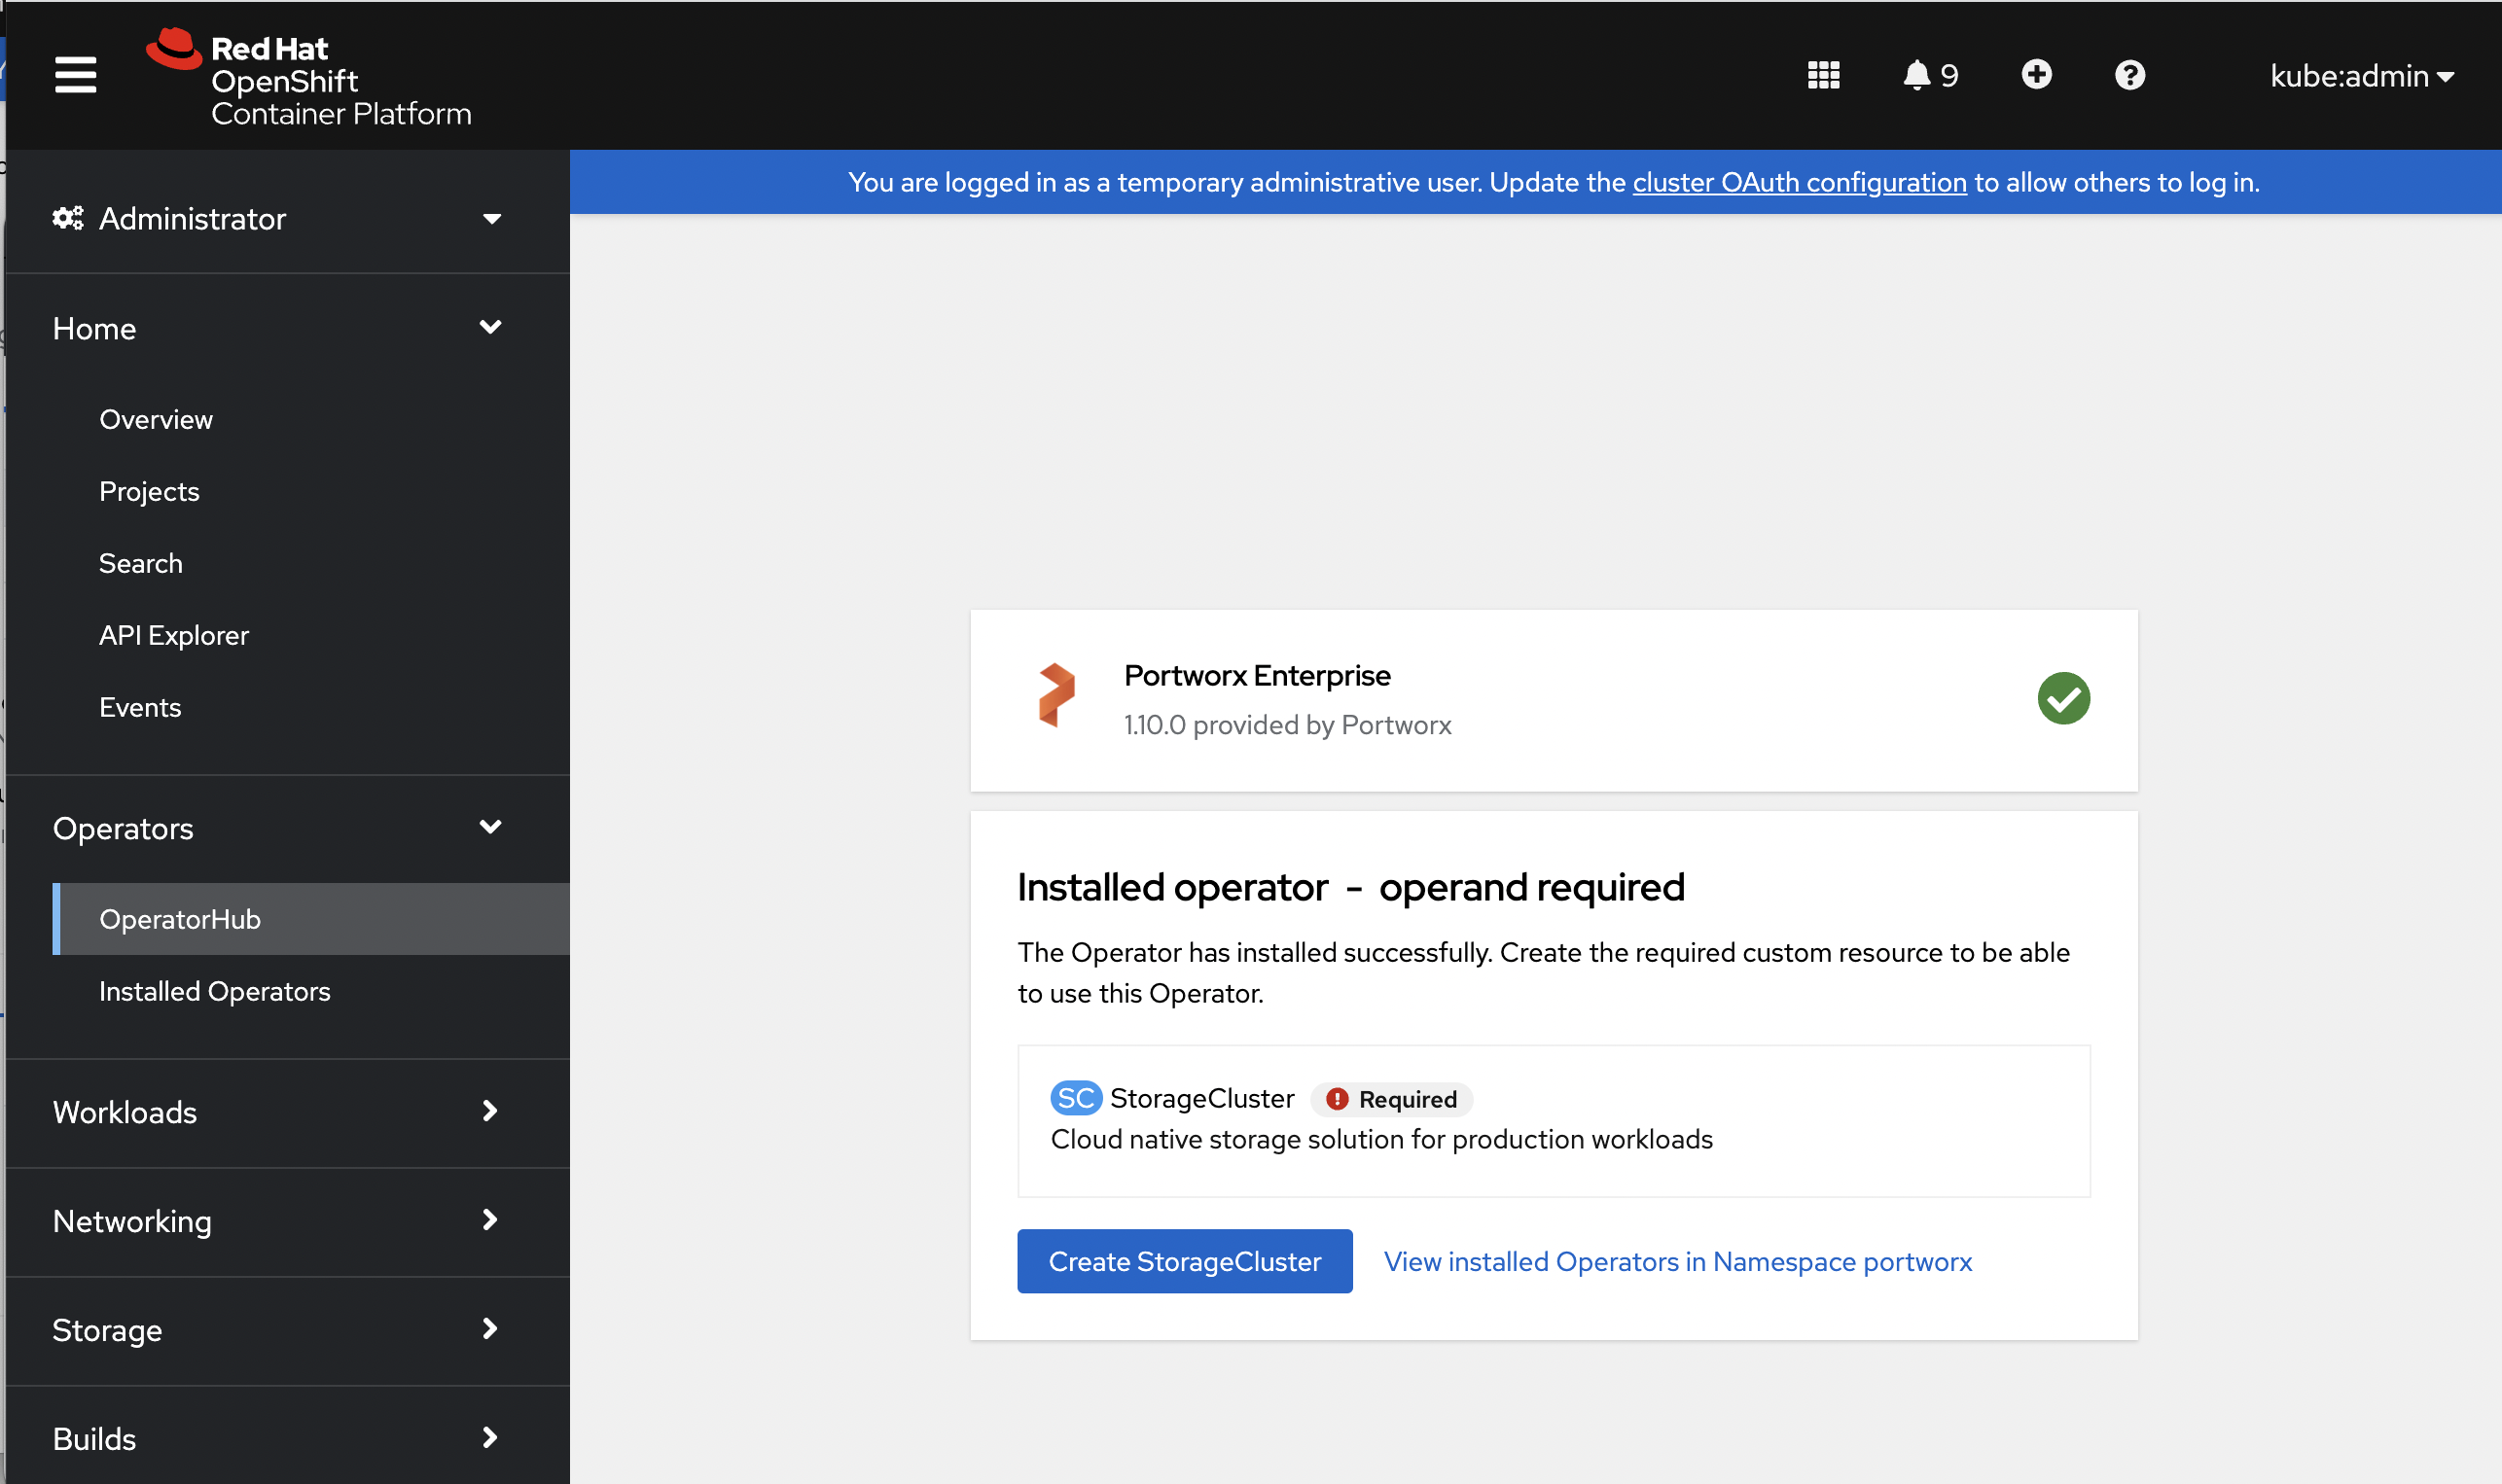
Deploy Portworx using OpenShift UI
Once the Operator is successfully installed, a Create StorageCluster button appears. Click the button to create a StorageCluster object:
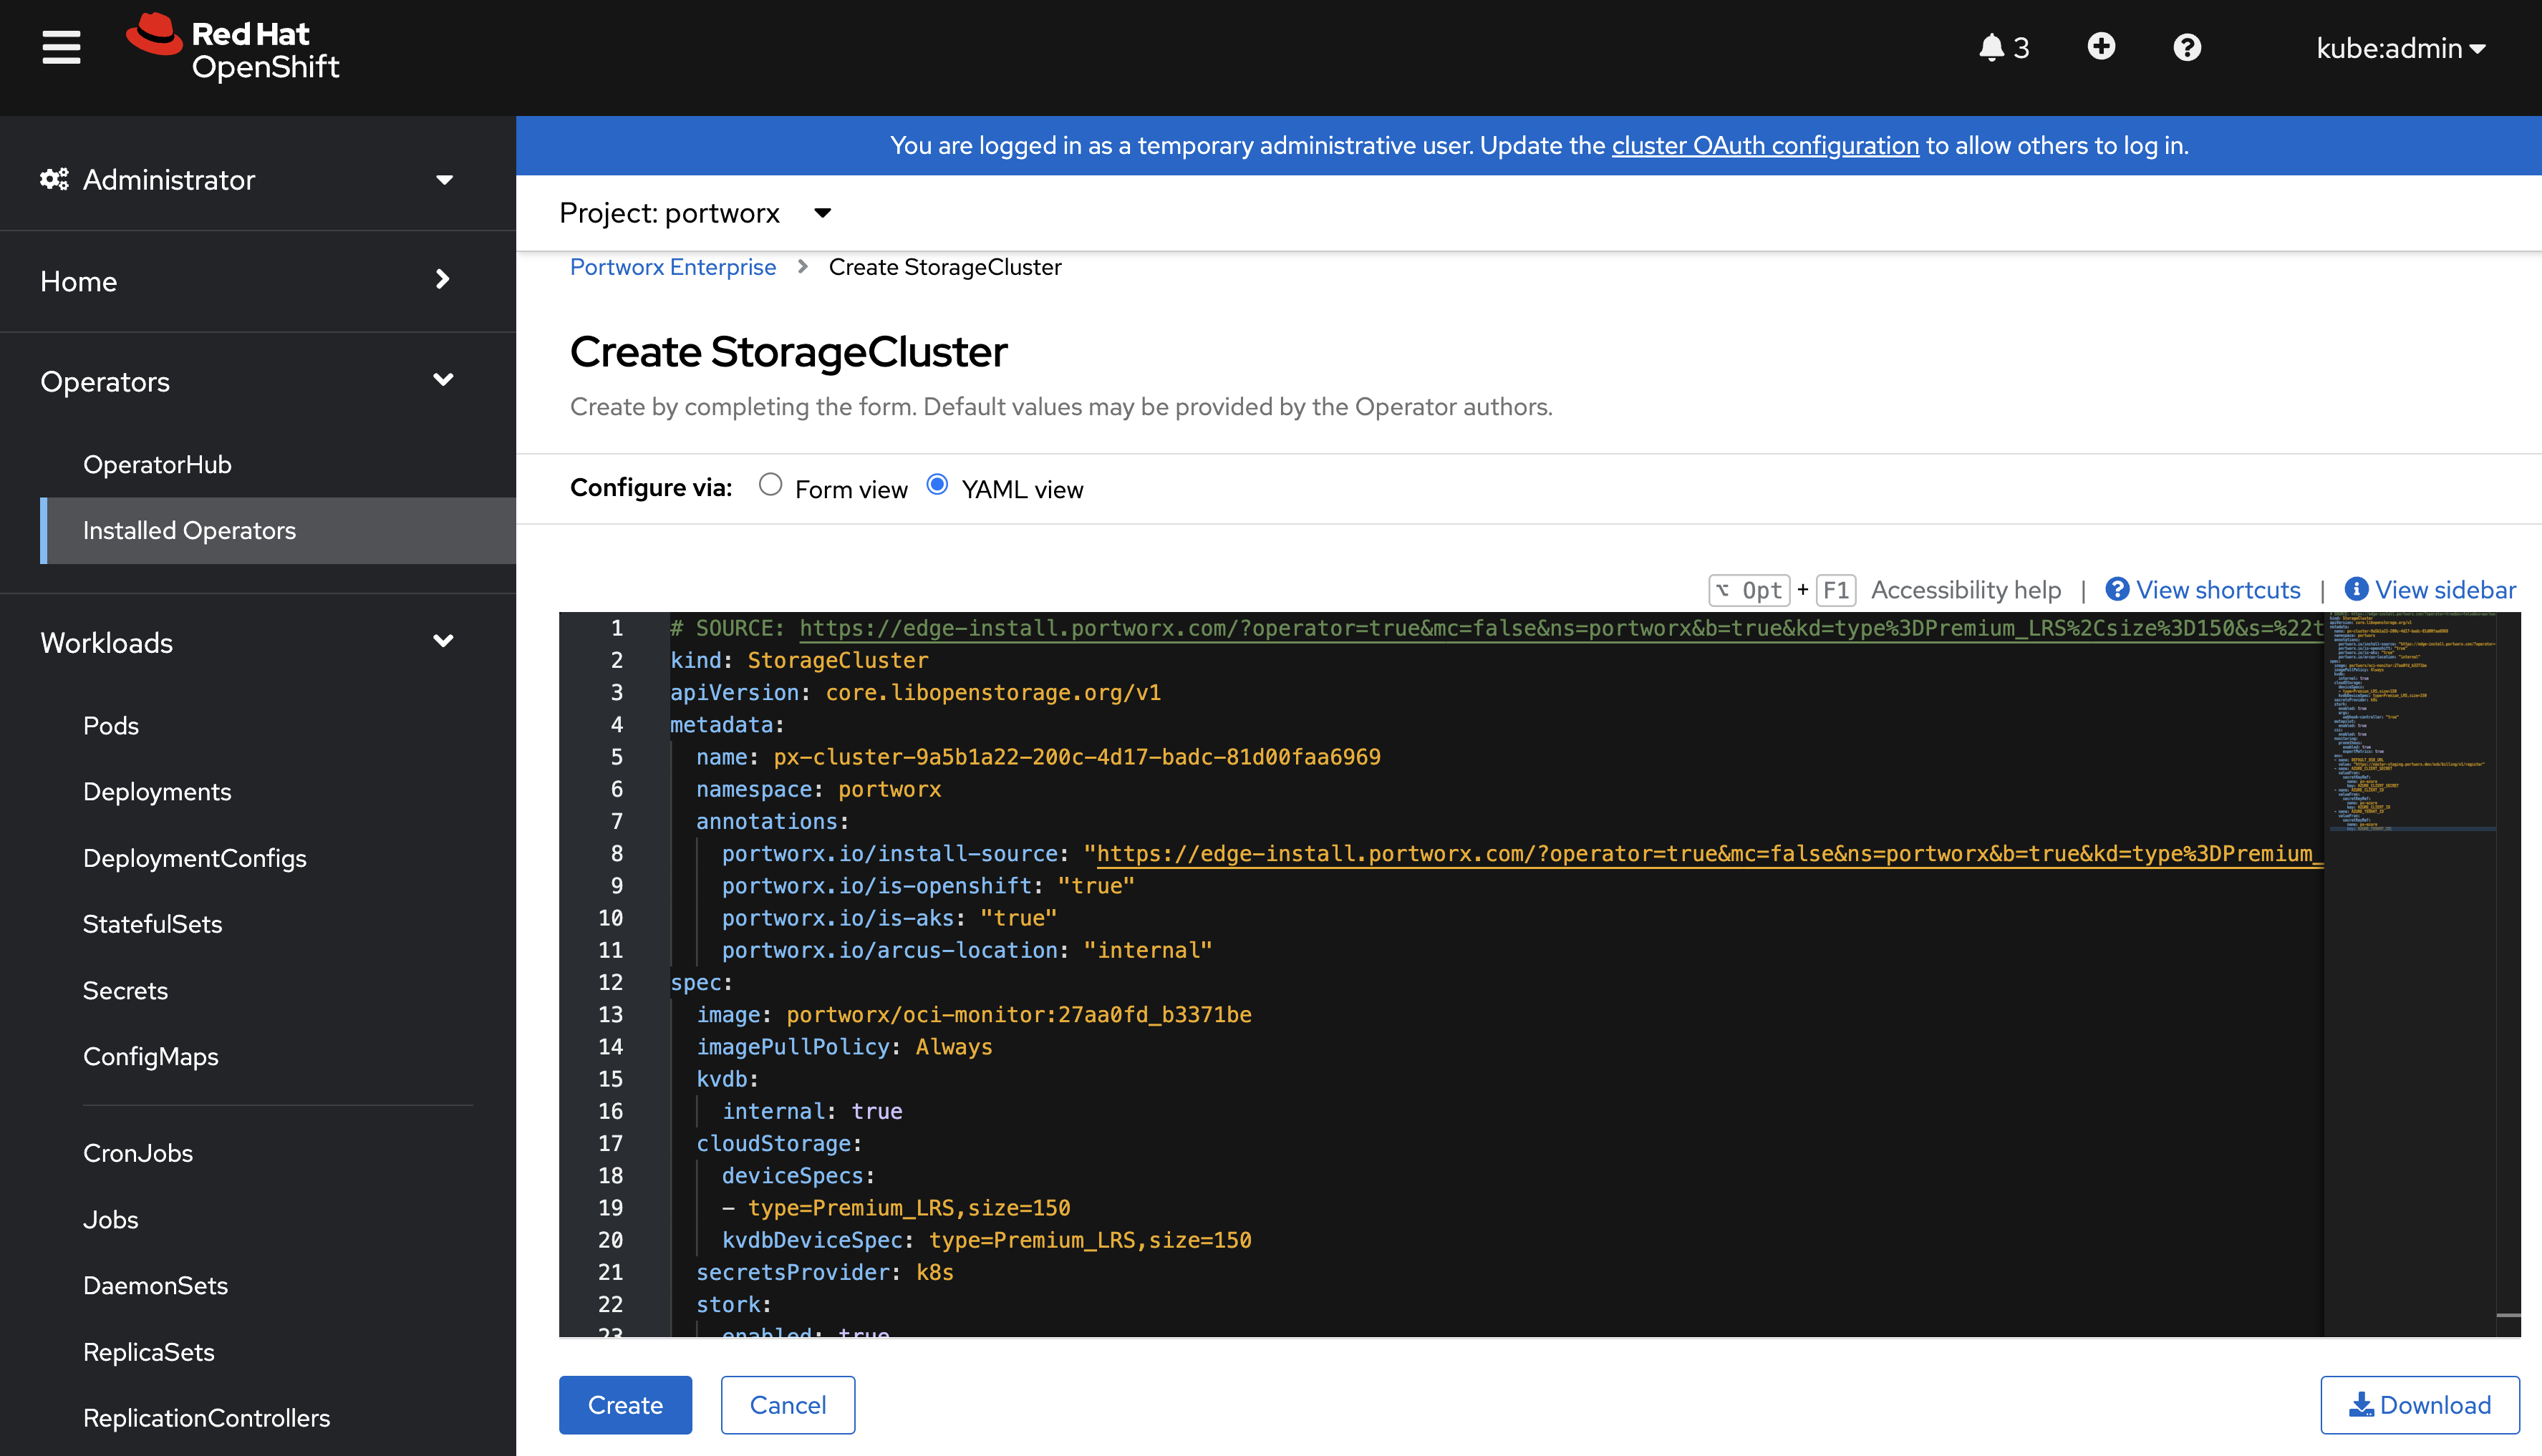
On the Create StorageCluster page, choose YAML view to configure the StorageCluster object.
Copy and paste the Portworx spec that you generated in the Generate Portworx spec section into the text editor, then click Create to deploy Portworx:
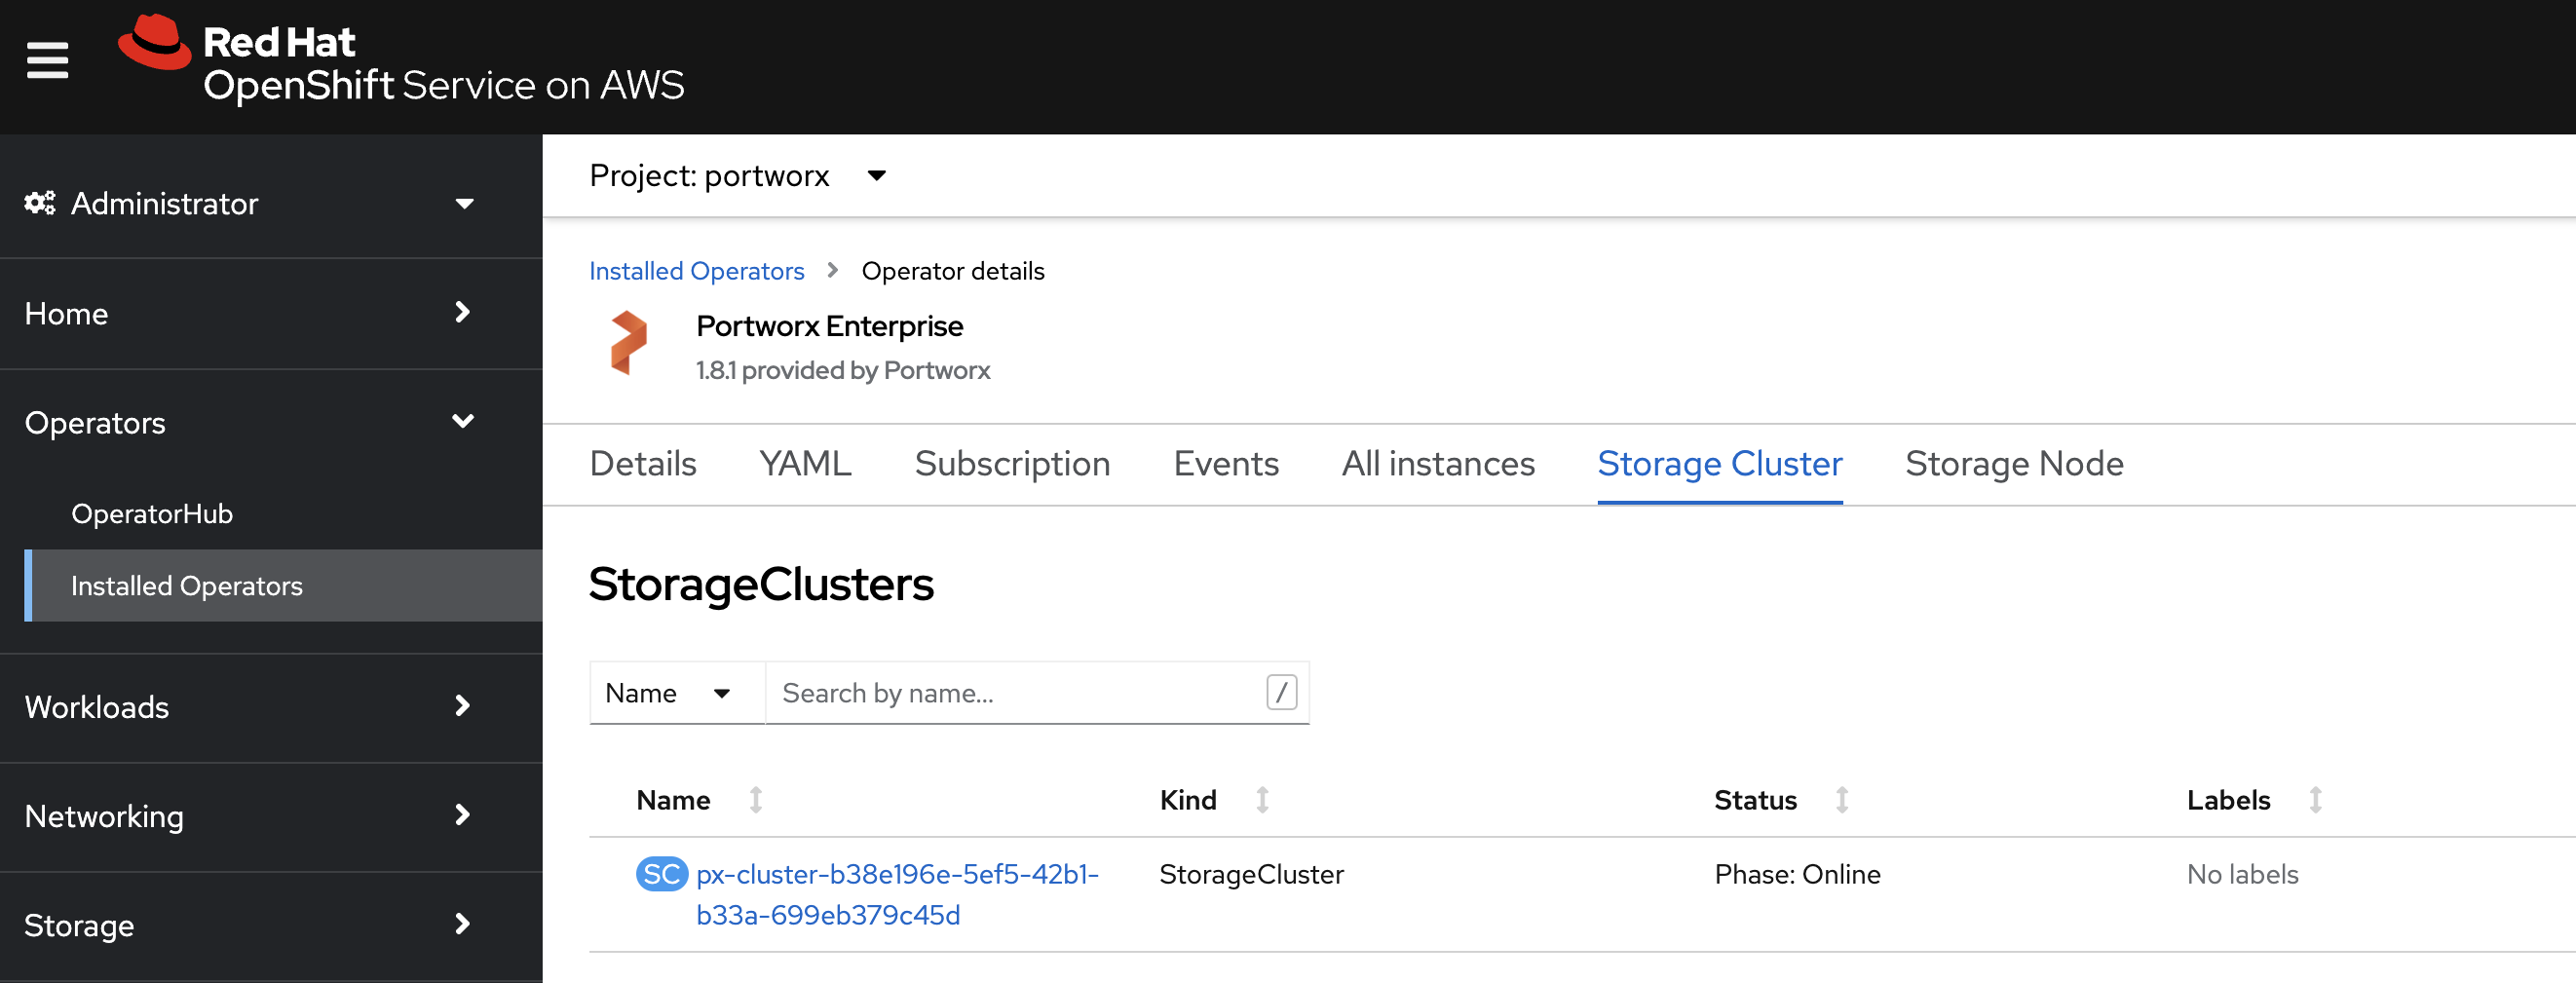
Verify that Portworx has deployed successfully by navigating to the Storage Cluster tab of the Installed Operators page. Once Portworx has fully deployed, the status will show as Online:
Refresh your browser to see the Portworx option in the left pane. Click the Cluster sub-tab to access the Portworx dashboard.
Verify your Portworx installation
Once you’ve installed Portworx, you can perform the following tasks to verify that Portworx has installed correctly.
Verify Portworx cluster status
Once you have created the StorageCluster, you can see the Portworx option in the left pane of the OpenShift UI. Click the Cluster sub-tab to view the Portworx dashboard.
If Portworx has been installed correctly, the status will be displayed as Running. You can also see the information about the status of Telemetry, Monitoring, and the version of Portworx and its components installed in your cluster.
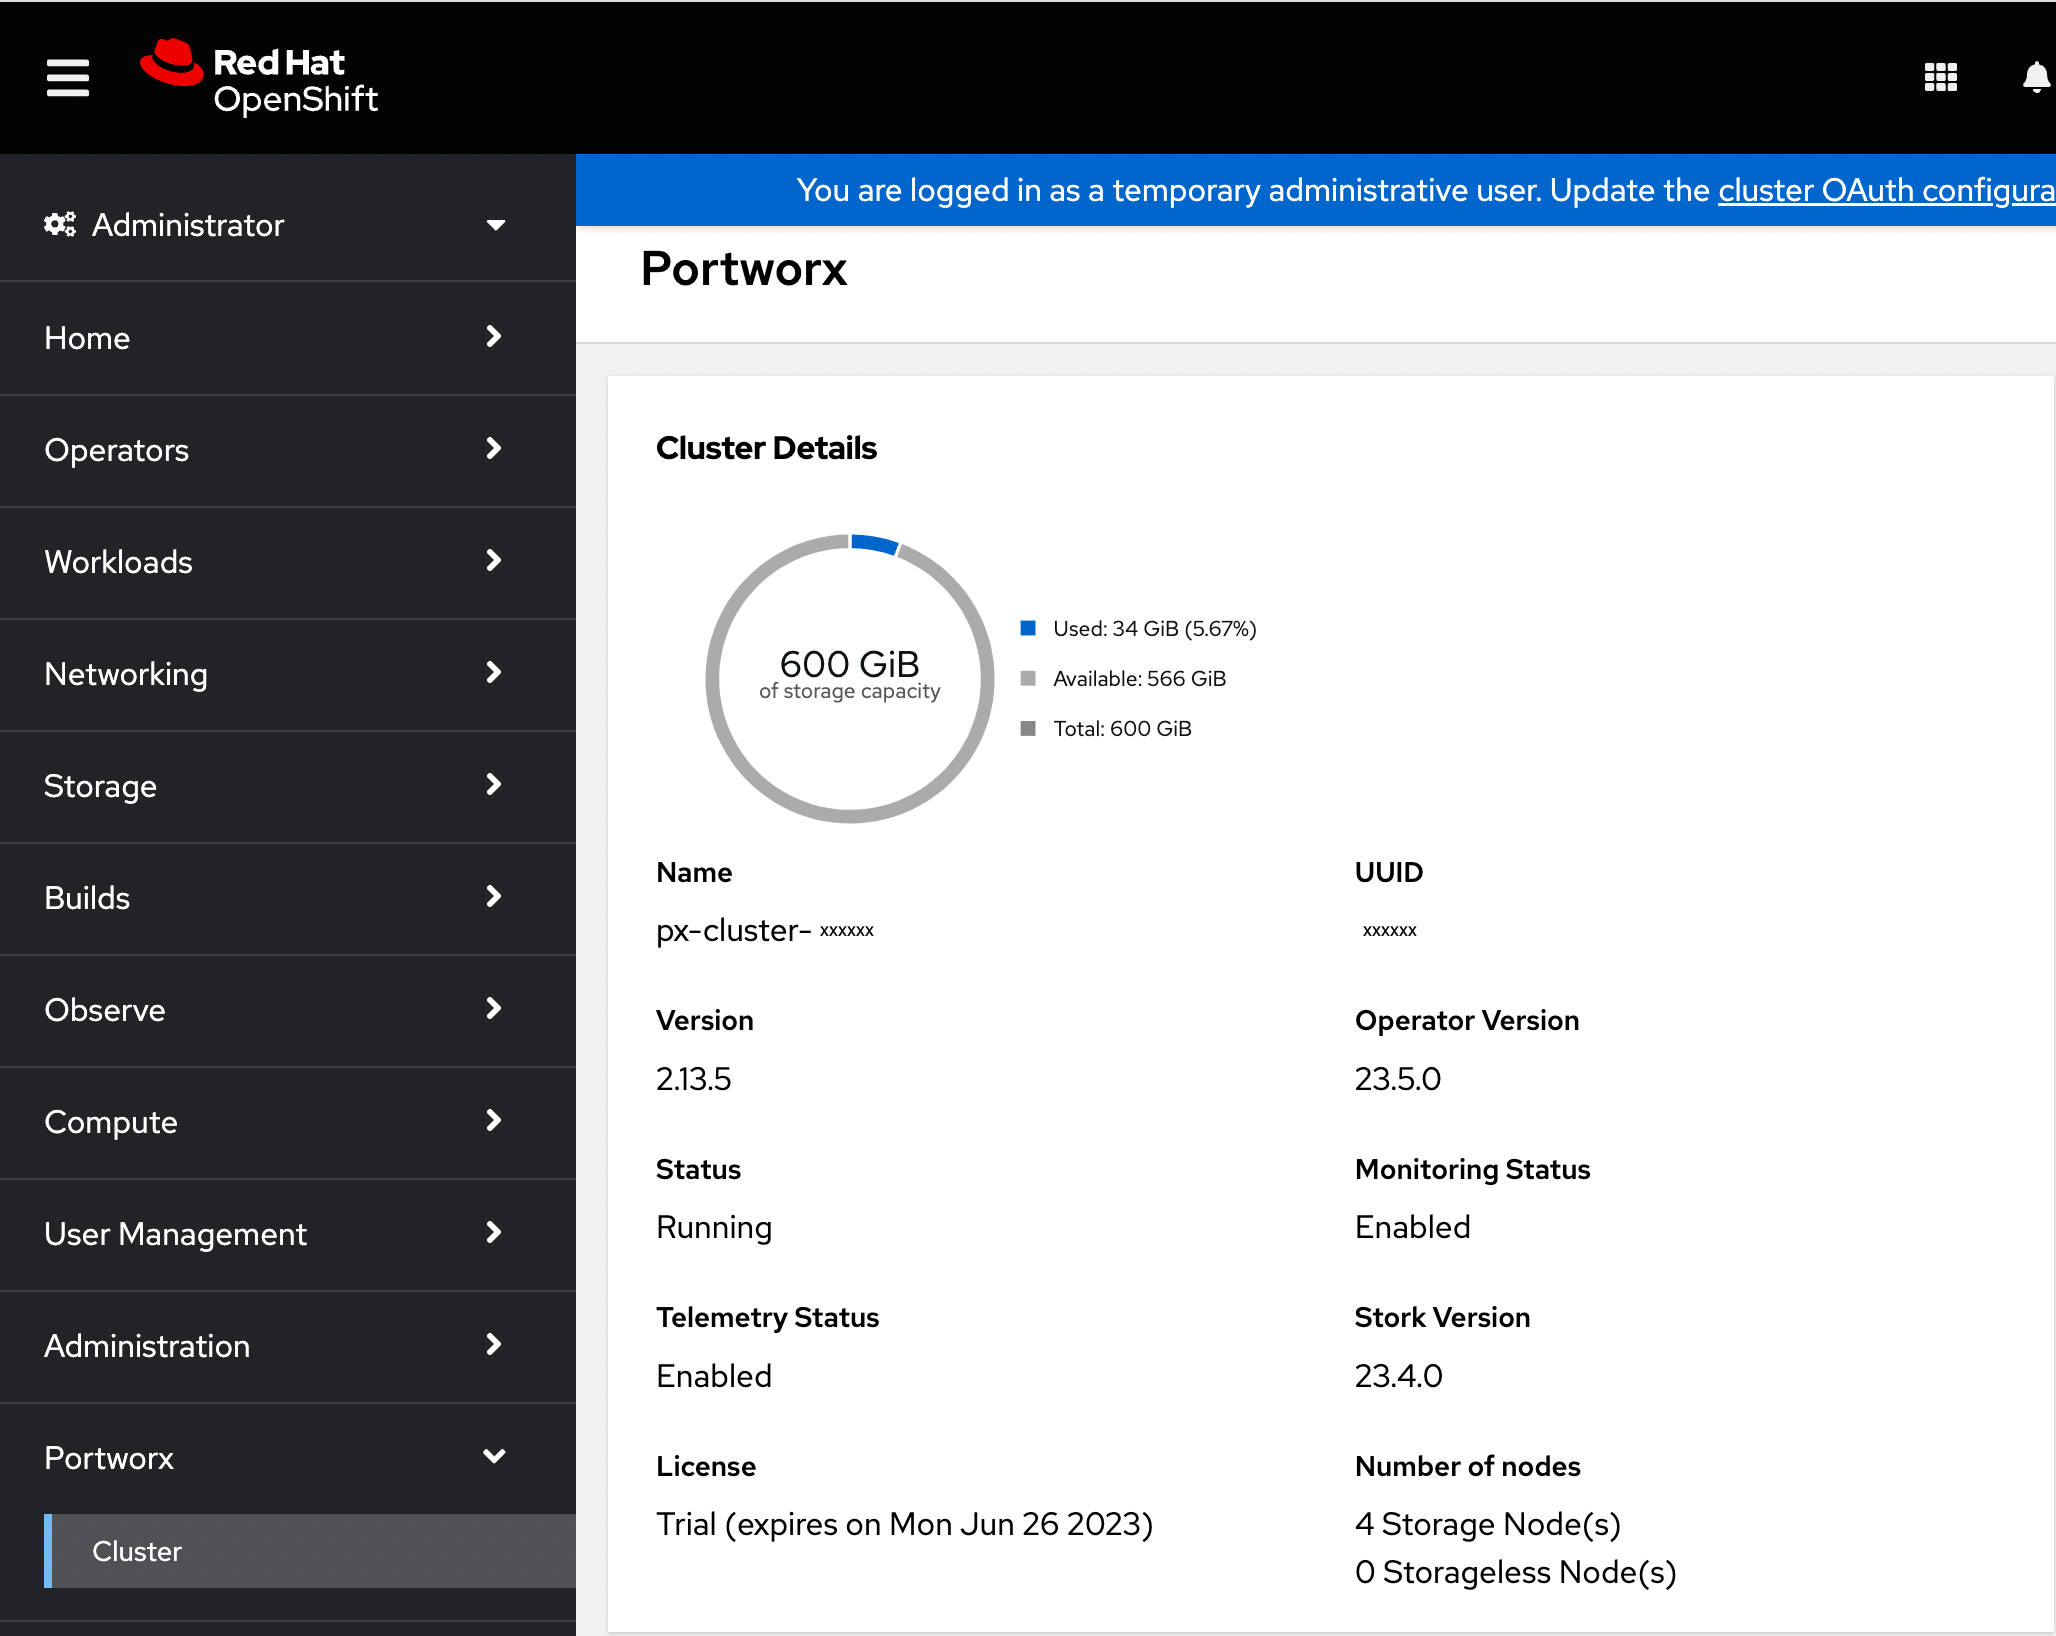
Navigate to the Node Summary section. If your cluster is running as intended, the status of all Portworx nodes should be Online.
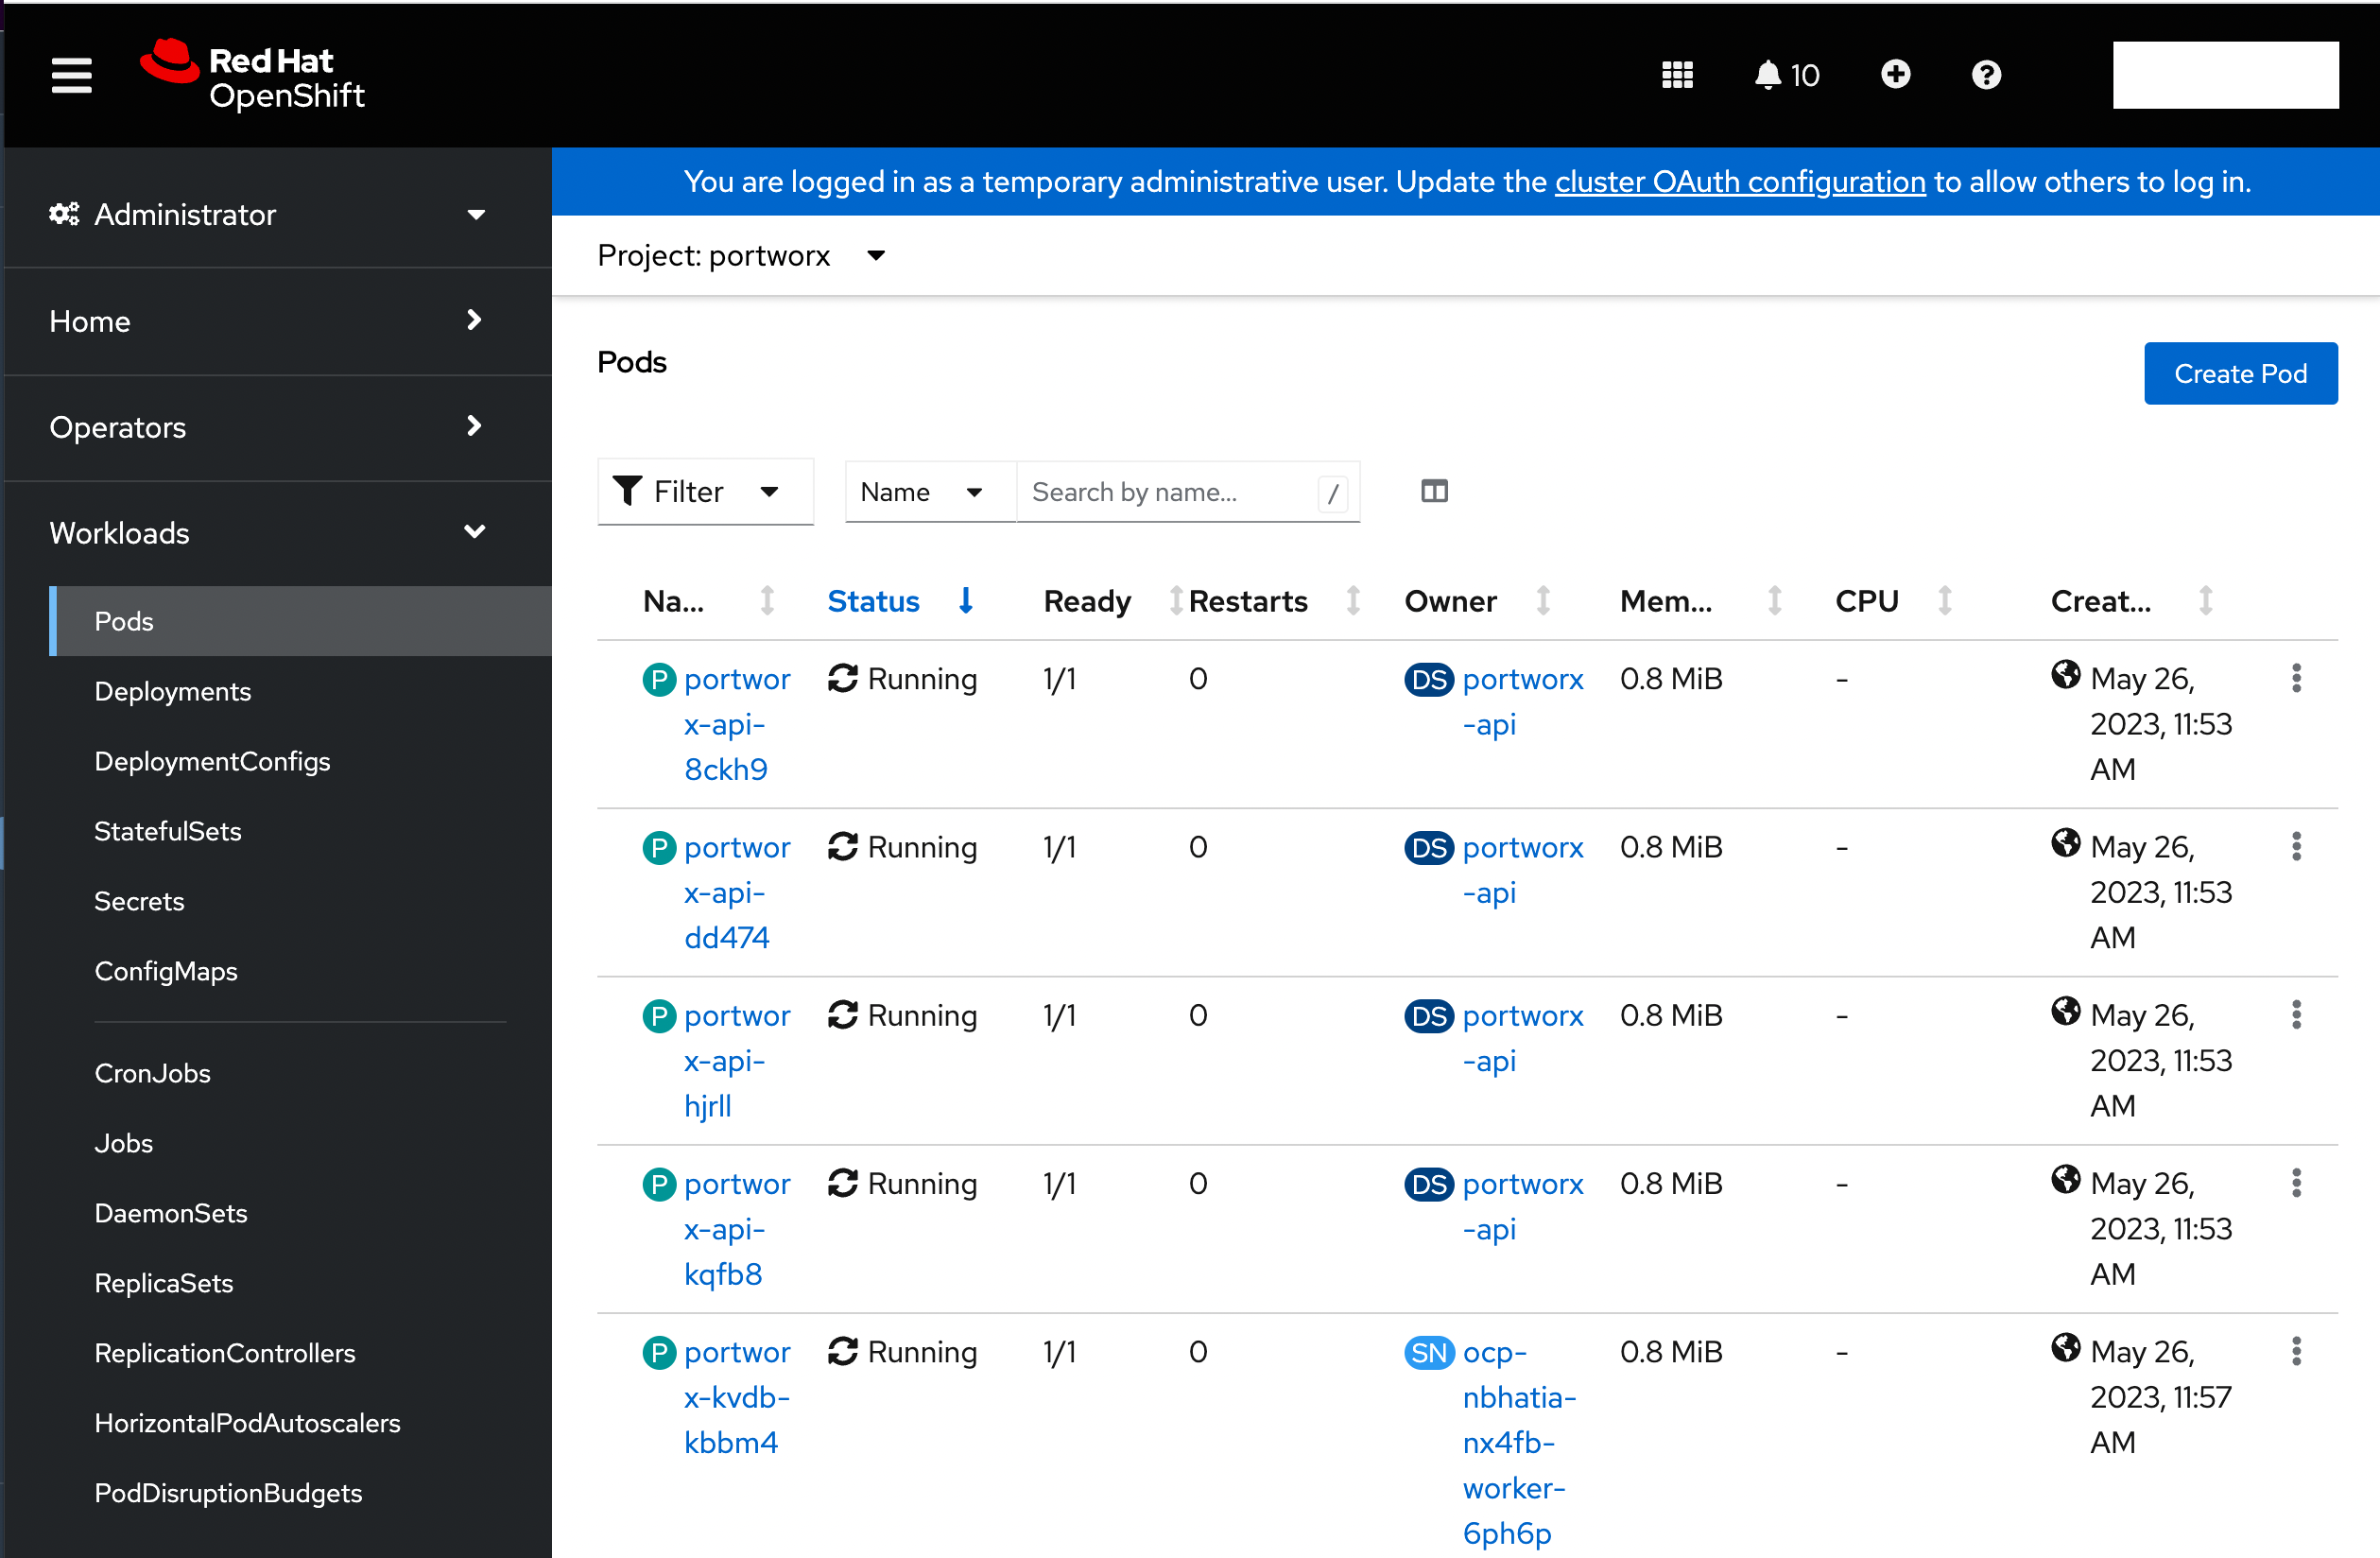
Verify if all pods are running
From the left pane of the OpenShift UI, click Pods under the Workload option. To check the status of all pods in the portworx namespace, select portworx from the Project drop-down. If Portworx is installed correctly, then all pods should be in the Running status:
Create your first PVC
For your apps to use persistent volumes powered by Portworx, you must use a StorageClass that references Portworx as the provisioner. Portworx includes a number of default StorageClasses, which you can reference with PersistentVolumeClaims (PVCs) you create. For a more general overview of how storage works within Kubernetes, refer to the Persistent Volumes section of the Kubernetes documentation.
Perform the following steps to create a PVC:
Paste the following in the text-editor to create a PVC referencing the
px-csi-dbdefault StorageClass and click Create:kind: PersistentVolumeClaim apiVersion: v1 metadata: name: px-check-pvc spec: storageClassName: px-csi-db accessModes: - ReadWriteOnce resources: requests: storage: 2GiRun the
oc applycommand to create a PVC:oc apply -f <your-pvc-name>.yamlpersistentvolumeclaim/example-pvc created
Verify your StorageClass and PVC
- Navigate to the Portworx dashboard by clicking Cluster under the Portworx option in the left pane.
Scroll to the Volumes section under Cluster details to view the status of your PVCs:

The
Upstatus indicates that the PVC is successfully bound to a Persistent Volume and is available for use.