Install Portworx on Red Hat OpenShift Services on AWS with console plugin
Follow the instructions on this page to install Portworx on Red Hat OpenShift Services on AWS with console plugin.
Prerequisites
- You must have a Red Hat OpenShift Services on AWS (ROSA) cluster deployed on infrastructure that meets the minimum requirements for Portworx
- Your cluster must be running OpenShift 4.12 or higher
- Your instance size must be at least m5.xlarge with 3 compute nodes and have 3 availability zones
- Your cluster must meet AWS prerequisites for ROSA
- Ensure that OCP service is enabled from your AWS console
- AWS CLI installed and configured
- ROSA CLI installed and configured
- Ensure that any underlying nodes used for Portworx in OCP have Secure Boot disabled
Configure your environment
Follow the instructions in this section to setup your environment before deploying Portworx on a Red Hat OpenShift Services on AWS (ROSA) cluster.
Create an IAM policy
Follow these instructions from your AWS IAM console to grant the required permissions to Portworx:
- From the IAM page, click Roles in the left pane.
- On the Roles page, type your cluster name in the search bar and press enter. Click your cluster’s worker role from the search results.
From the worker role summary page, click Add permissions on the Permissions subpage, and then click Create inline policy from the dropdown menu.
Copy and paste the following into the JSON tab text-box and click Review policy:
{
    "Version": "2012-10-17",
    "Statement": [
        {
            "Sid": "",
            "Effect": "Allow",
            "Action": [
              "ec2:AttachVolume",
              "ec2:ModifyVolume",
              "ec2:DetachVolume",
              "ec2:CreateTags",
              "ec2:CreateVolume",
              "ec2:DeleteTags",
              "ec2:DeleteVolume",
              "ec2:DescribeTags",
              "ec2:DescribeVolumeAttribute",
              "ec2:DescribeVolumesModifications",
              "ec2:DescribeVolumeStatus",
              "ec2:DescribeVolumes",
              "ec2:DescribeInstances",
              "autoscaling:DescribeAutoScalingGroups"
            ],
            "Resource": [
              "*"
            ]
        }
    ]
}
Provide Name and click Create policy. Once your policy is successfully created for your cluster’s worker role, it will be listed in the Permissions policies section.
Open ports for worker nodes
Perform the following to add the inbound rules so that the AWS EC2 instance uses your specified security groups to control the incoming traffic.
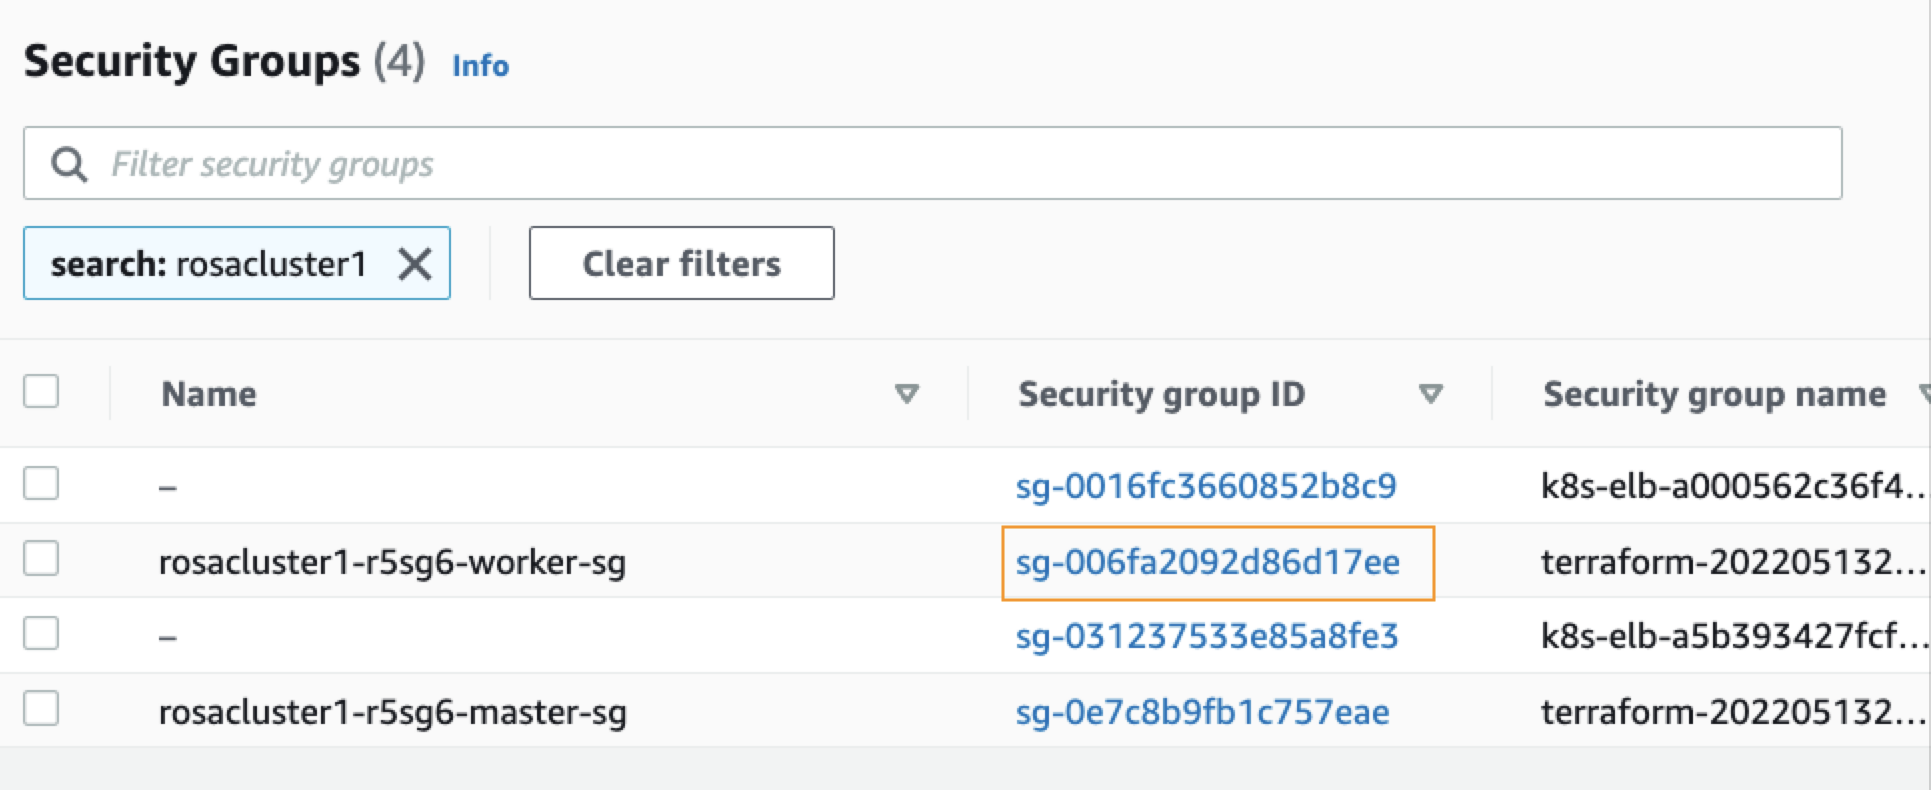
From the EC2 page of your AWS console, click Security Groups, under Network & Security, in the left pane.
On the Security Groups page, type your ROSA cluster name in the search bar and press enter. You will see a list of security groups associated with your cluster. Click the link under Security group ID of your cluster’s worker security group:
From your security group page, click Actions in the upper-right corner, and choose Edit inbound rules from the dropdown menu.
Click Add Rule at the bottom of the screen to add each of the following rules:
- Allow inbound Custom TCP traffic with Protocol: TCP on ports 17001 - 17022
- Allow inbound Custom TCP traffic with Protocol: TCP on port 20048
- Allow inbound Custom TCP traffic with Protocol: TCP on port 111
- Allow inbound Custom UDP traffic with Protocol: UDP on port 17002
- Allow inbound NFS traffic with Protocol: TCP on port 2049
Make sure to specify the security group ID of the same worker security group that is mentioned in step 2.
Click Save rule.
Install Portworx
Follow the instructions in this section to deploy Portworx.
Generate Portworx spec
Navigate to PX-Central and log in, or create an account.
Select Portworx Enterprise from the Product Catalog page.
On the Product Line page, choose any option depending on which license you intend to use, then click Continue to start the spec generator.
For Platform, choose AWS. Under Distribution Name, select Red Hat OpenShift Service on AWS (ROSA). Enter your cluster’s Kubernetes version, then click Save Spec to generate the specs.
Log in to OpenShift UI
Log in to the OpenShift console by following the quick access instructions on the Accessing your cluster quickly page in the Red Hat OpenShift Service on AWS documentation.
Install Portworx Operator using the OpenShift UI
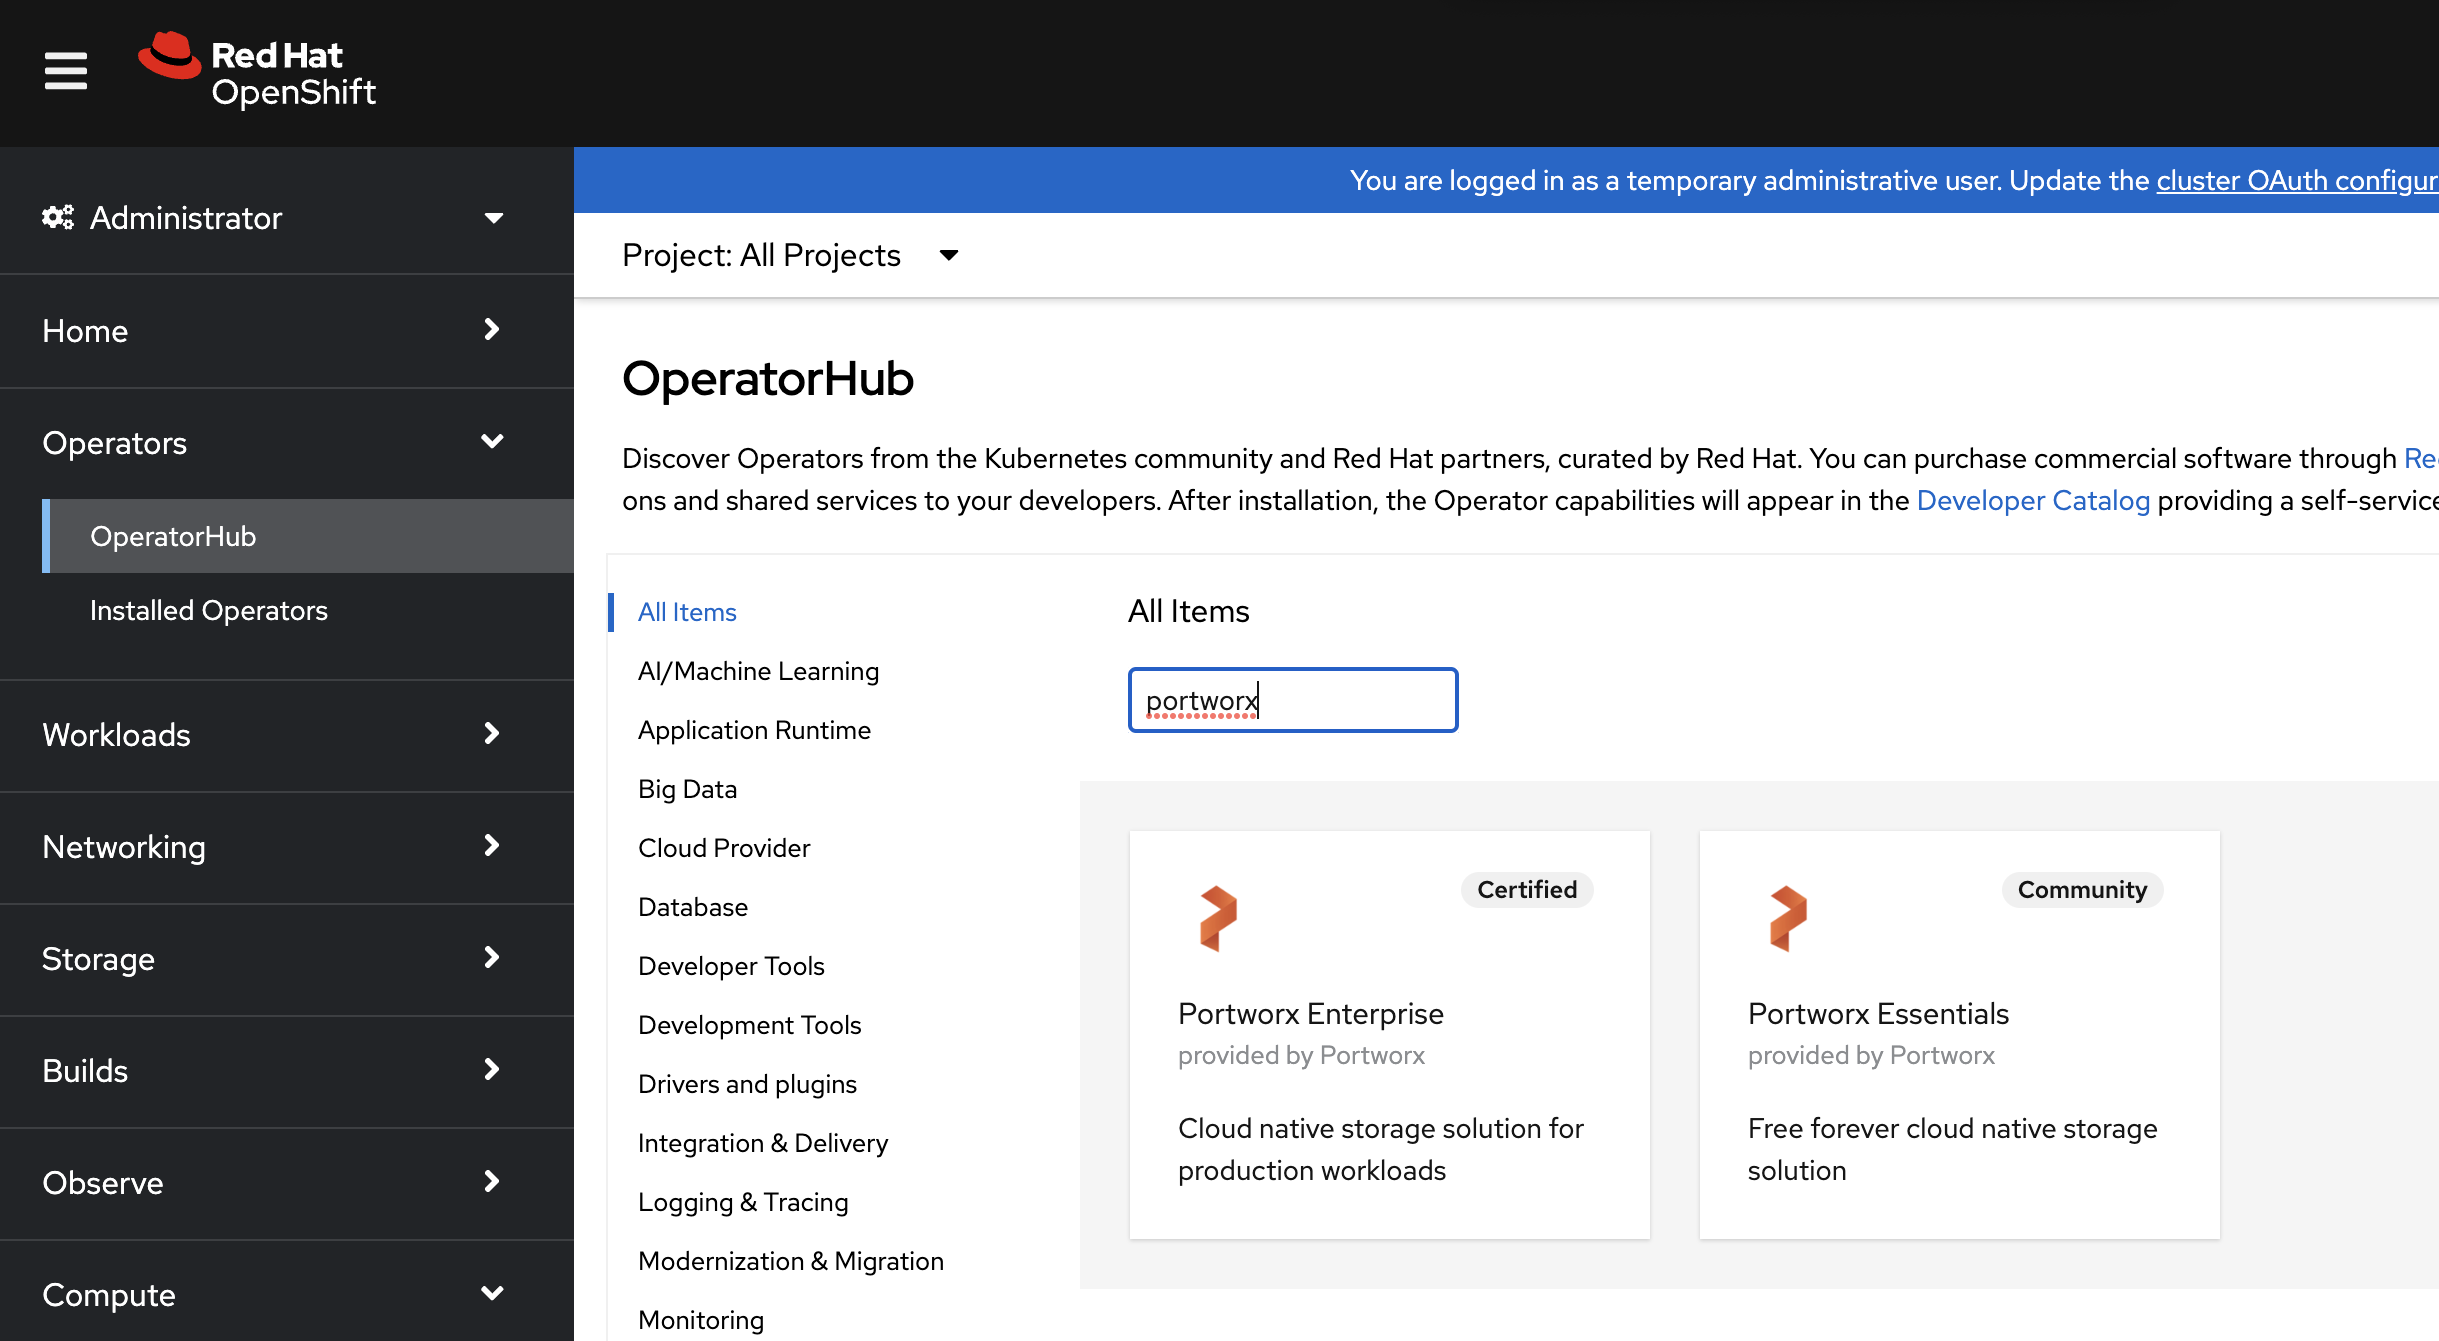
- From your OpenShift UI, select OperatorHub in the left pane.
On the OperatorHub page, search for Portworx and select the Portworx Enterprise or Portworx Essentials card:
Click Install to install Portworx Operator:
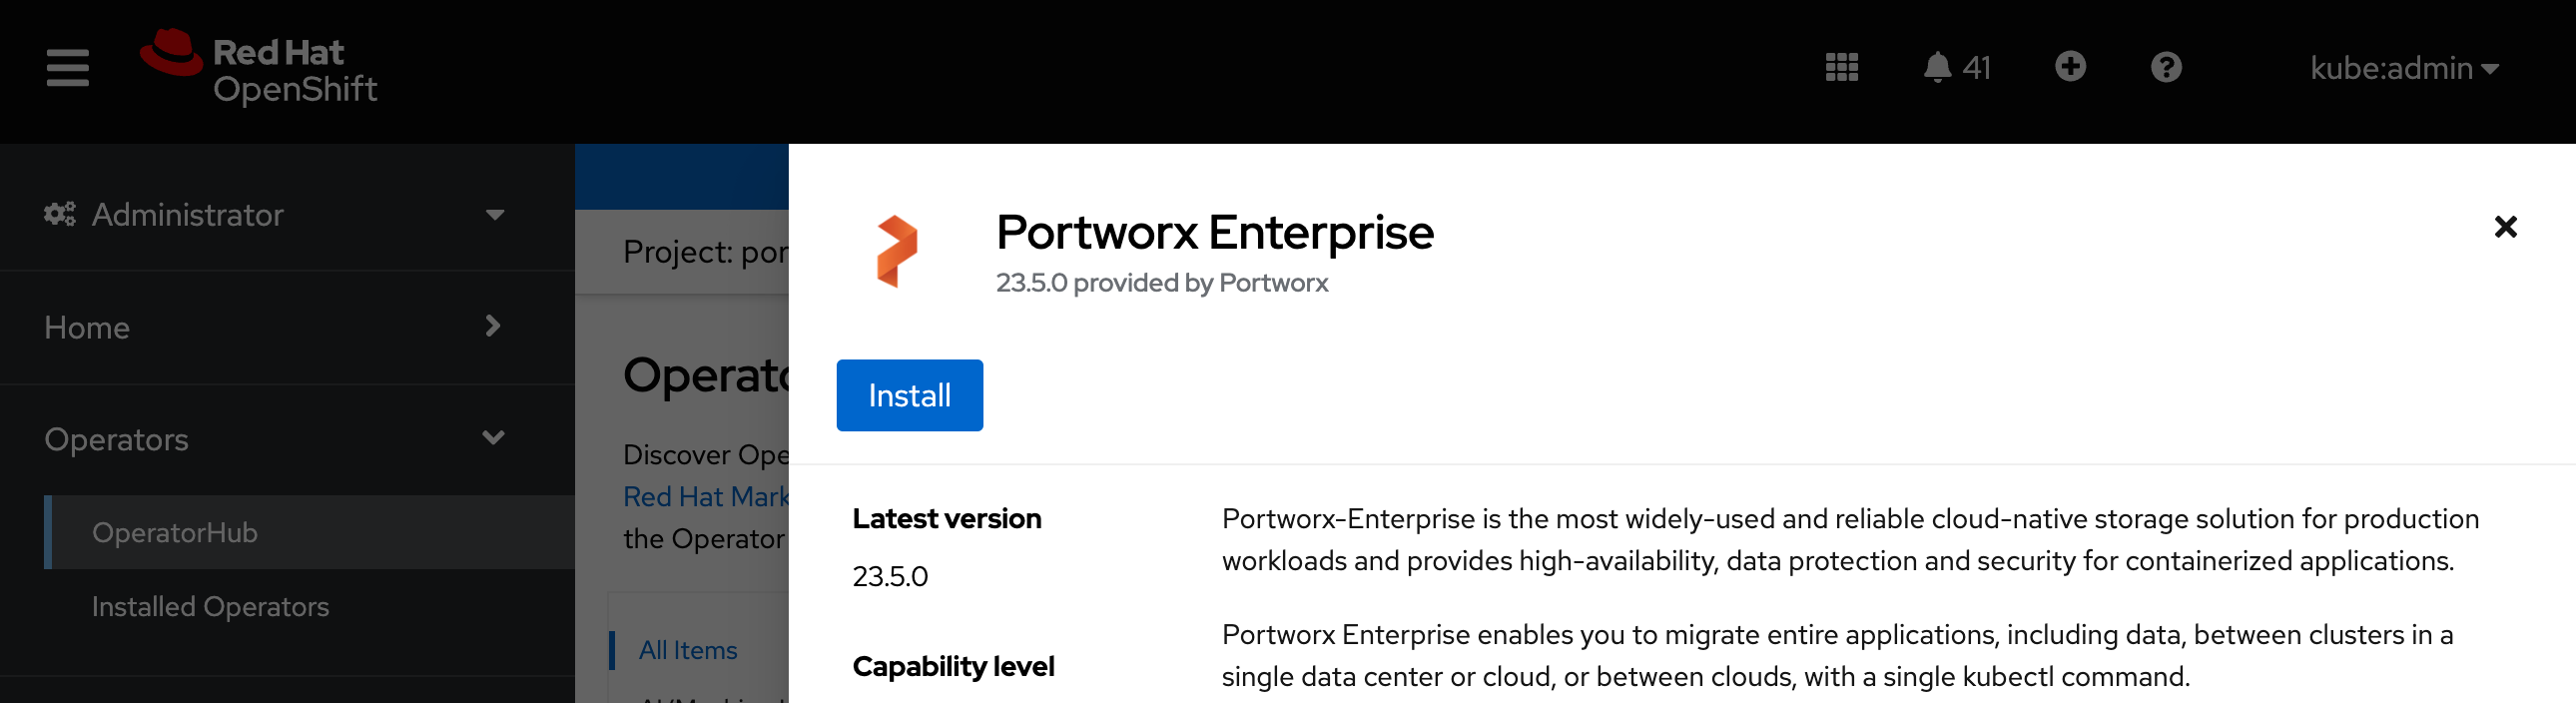
Portworx Operator begins to install and takes you to the Install Operator page. On this page.
- Select the A specific namespace on the cluster option for Installation mode.
- Choose the Create Project option from the Installed Namespace dropdown.
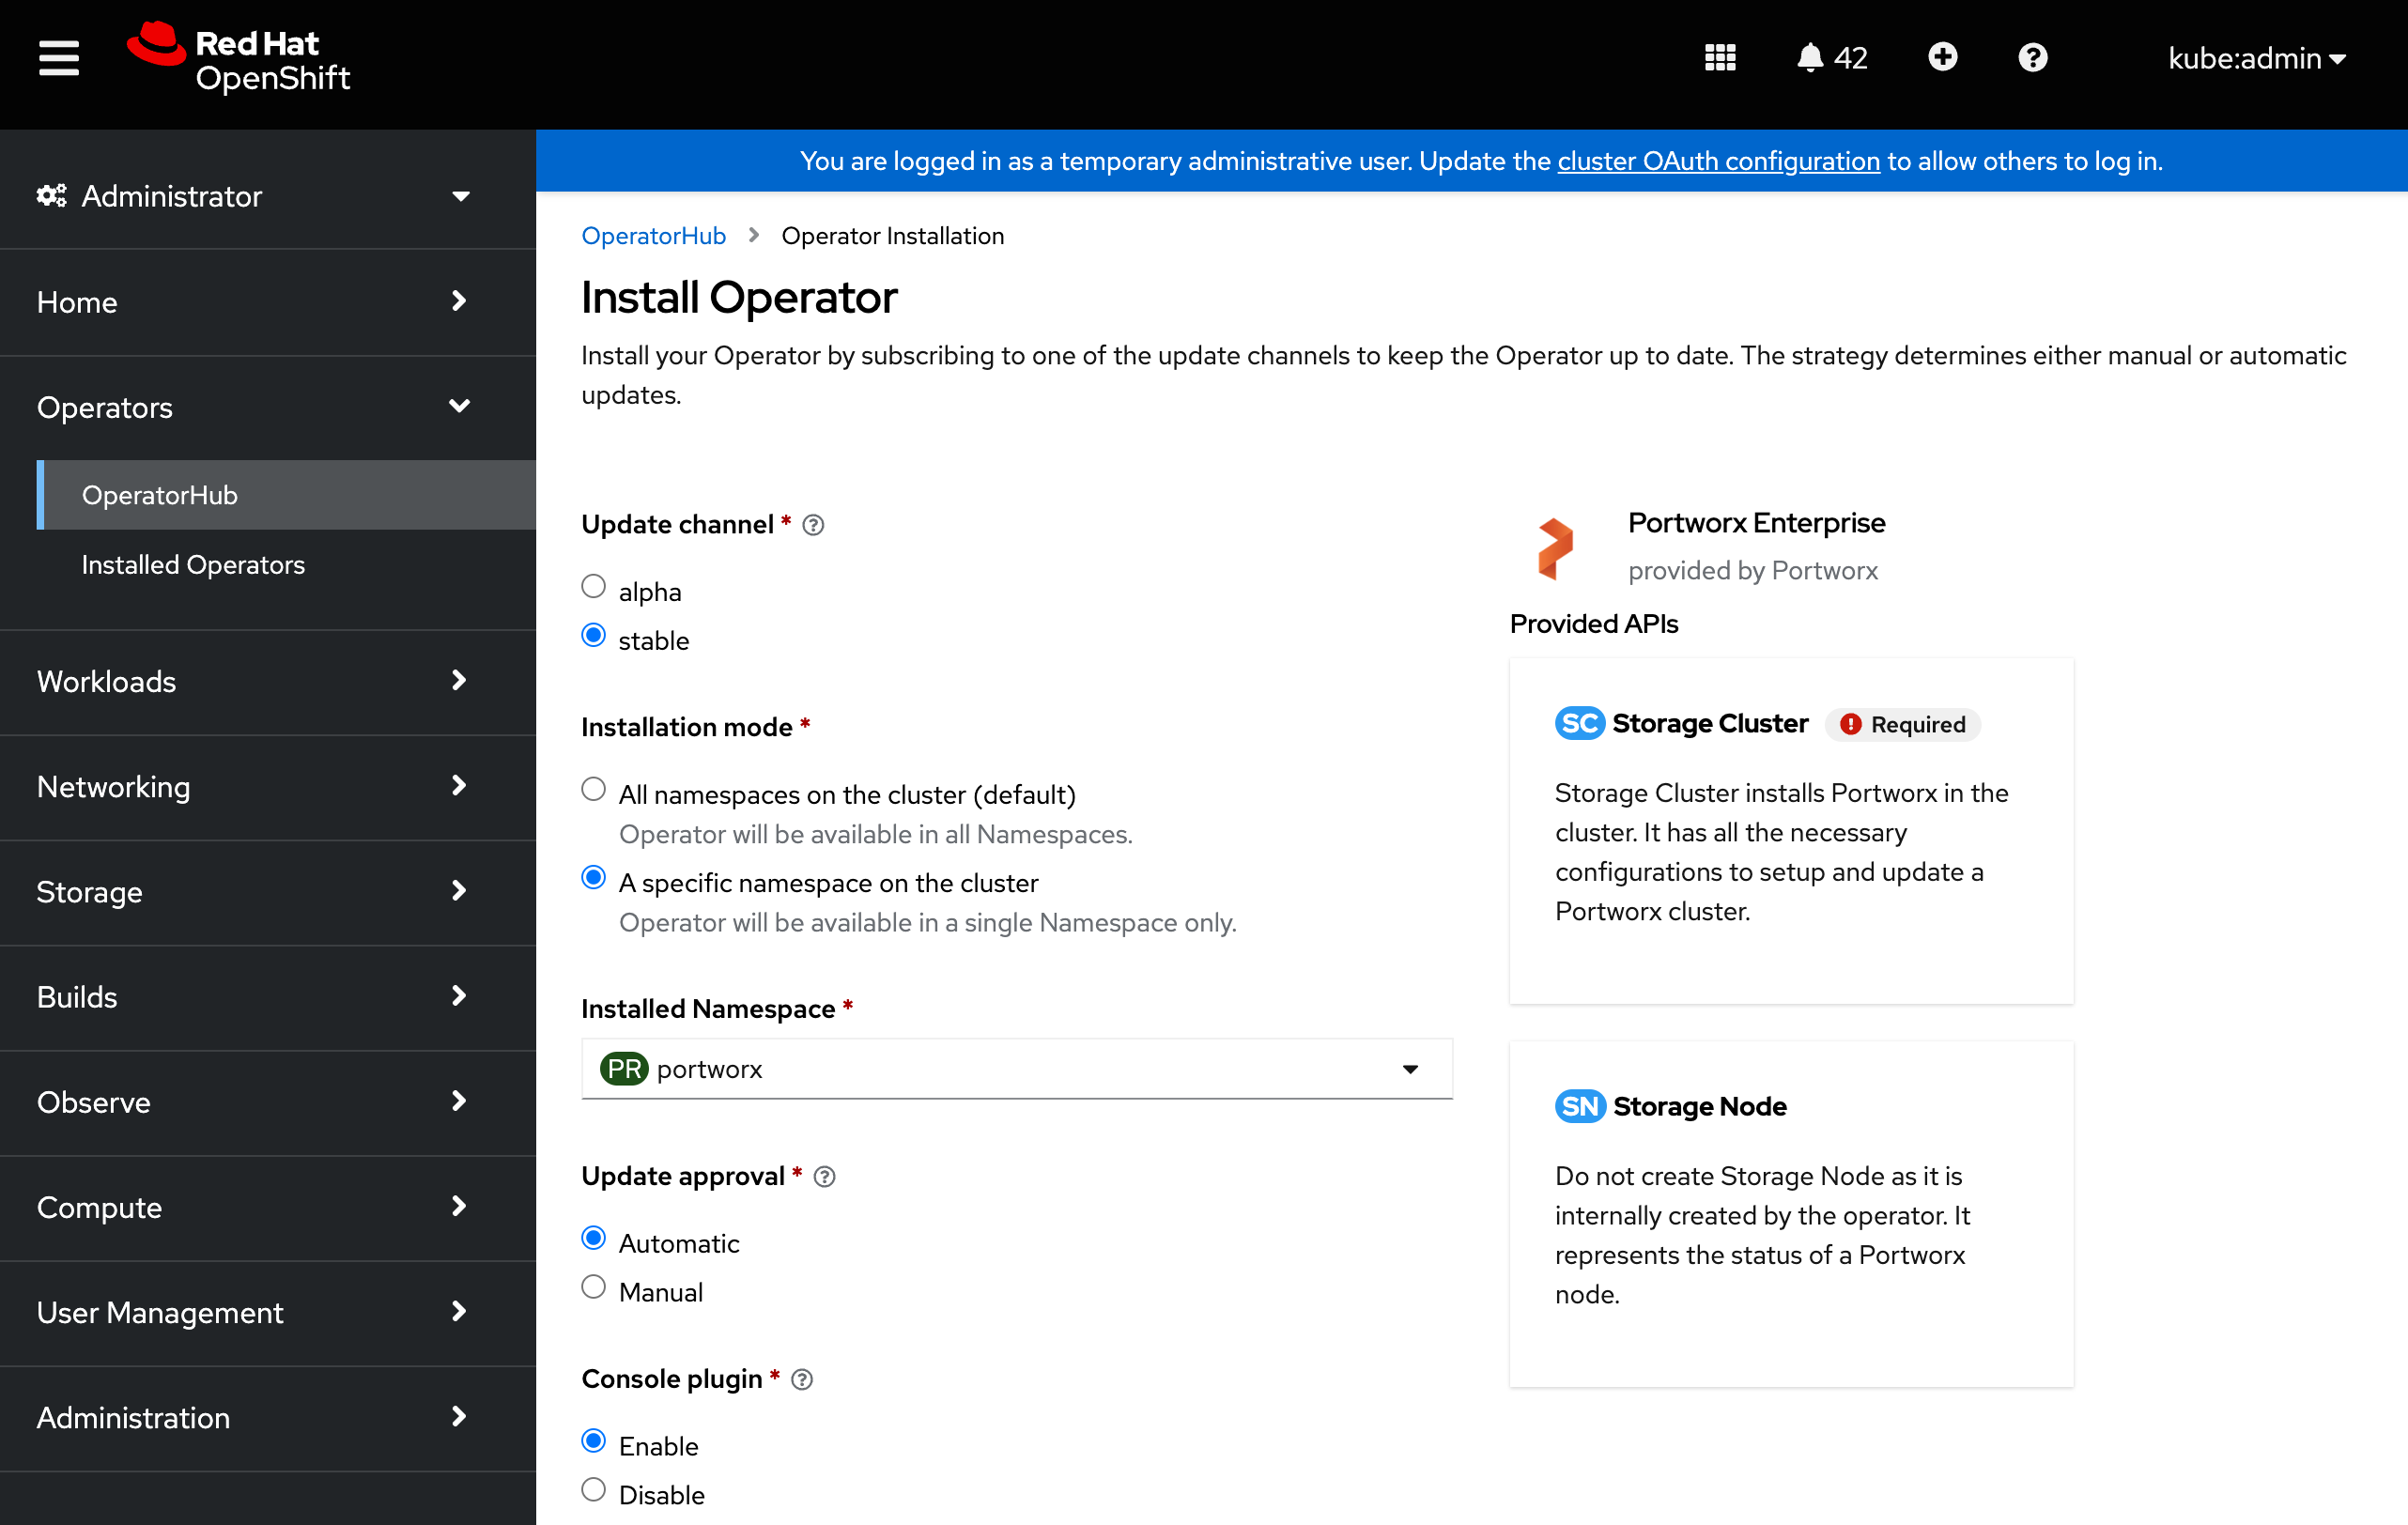
In the Create Project window, provide the name
portworxand click Create to create a namespace called portworx.To manage your Porworx cluster using the Portworx dashboard within the OpenShift UI, select Enable for the Console plugin option.
Click Install to deploy Portworx Operator in the
portworxnamespace.
Apply Portworx spec using OpenShift UI
Once the Operator is installed successfully, create a StorageCluster object from the same page by clicking Create StorageCluster:
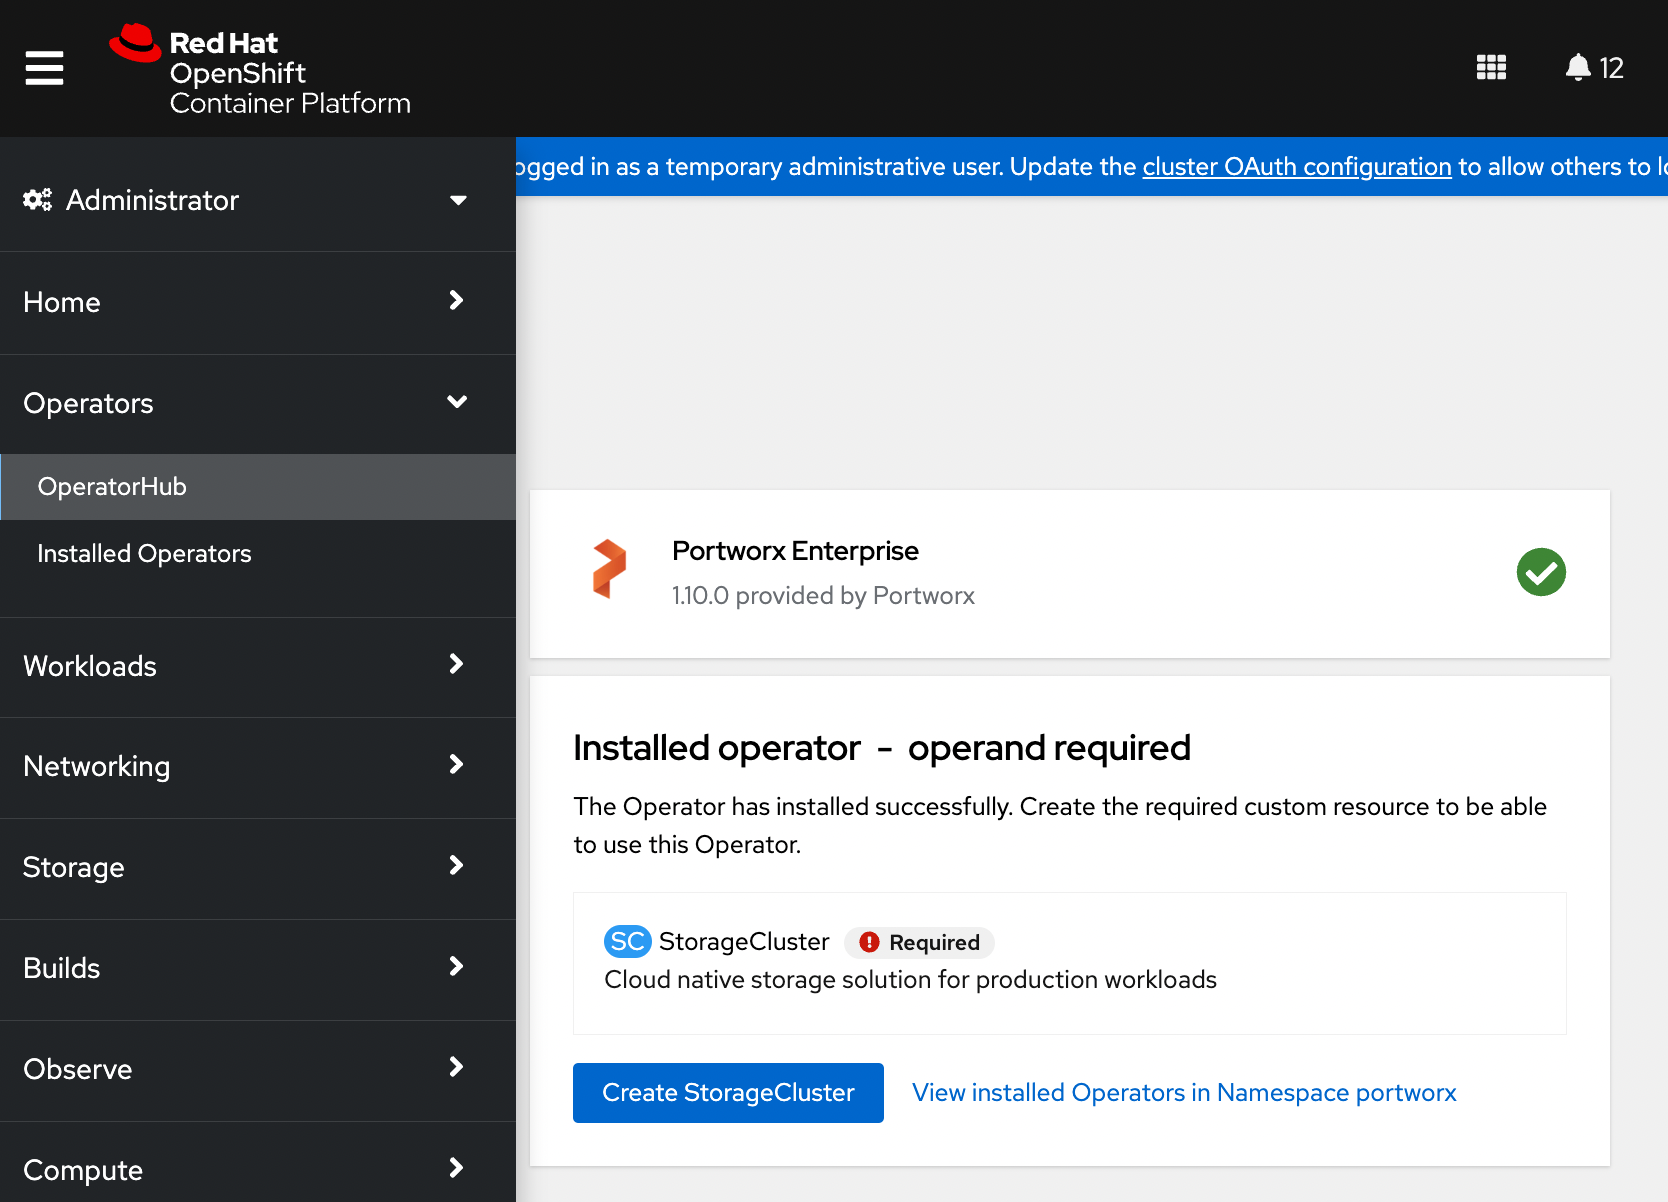
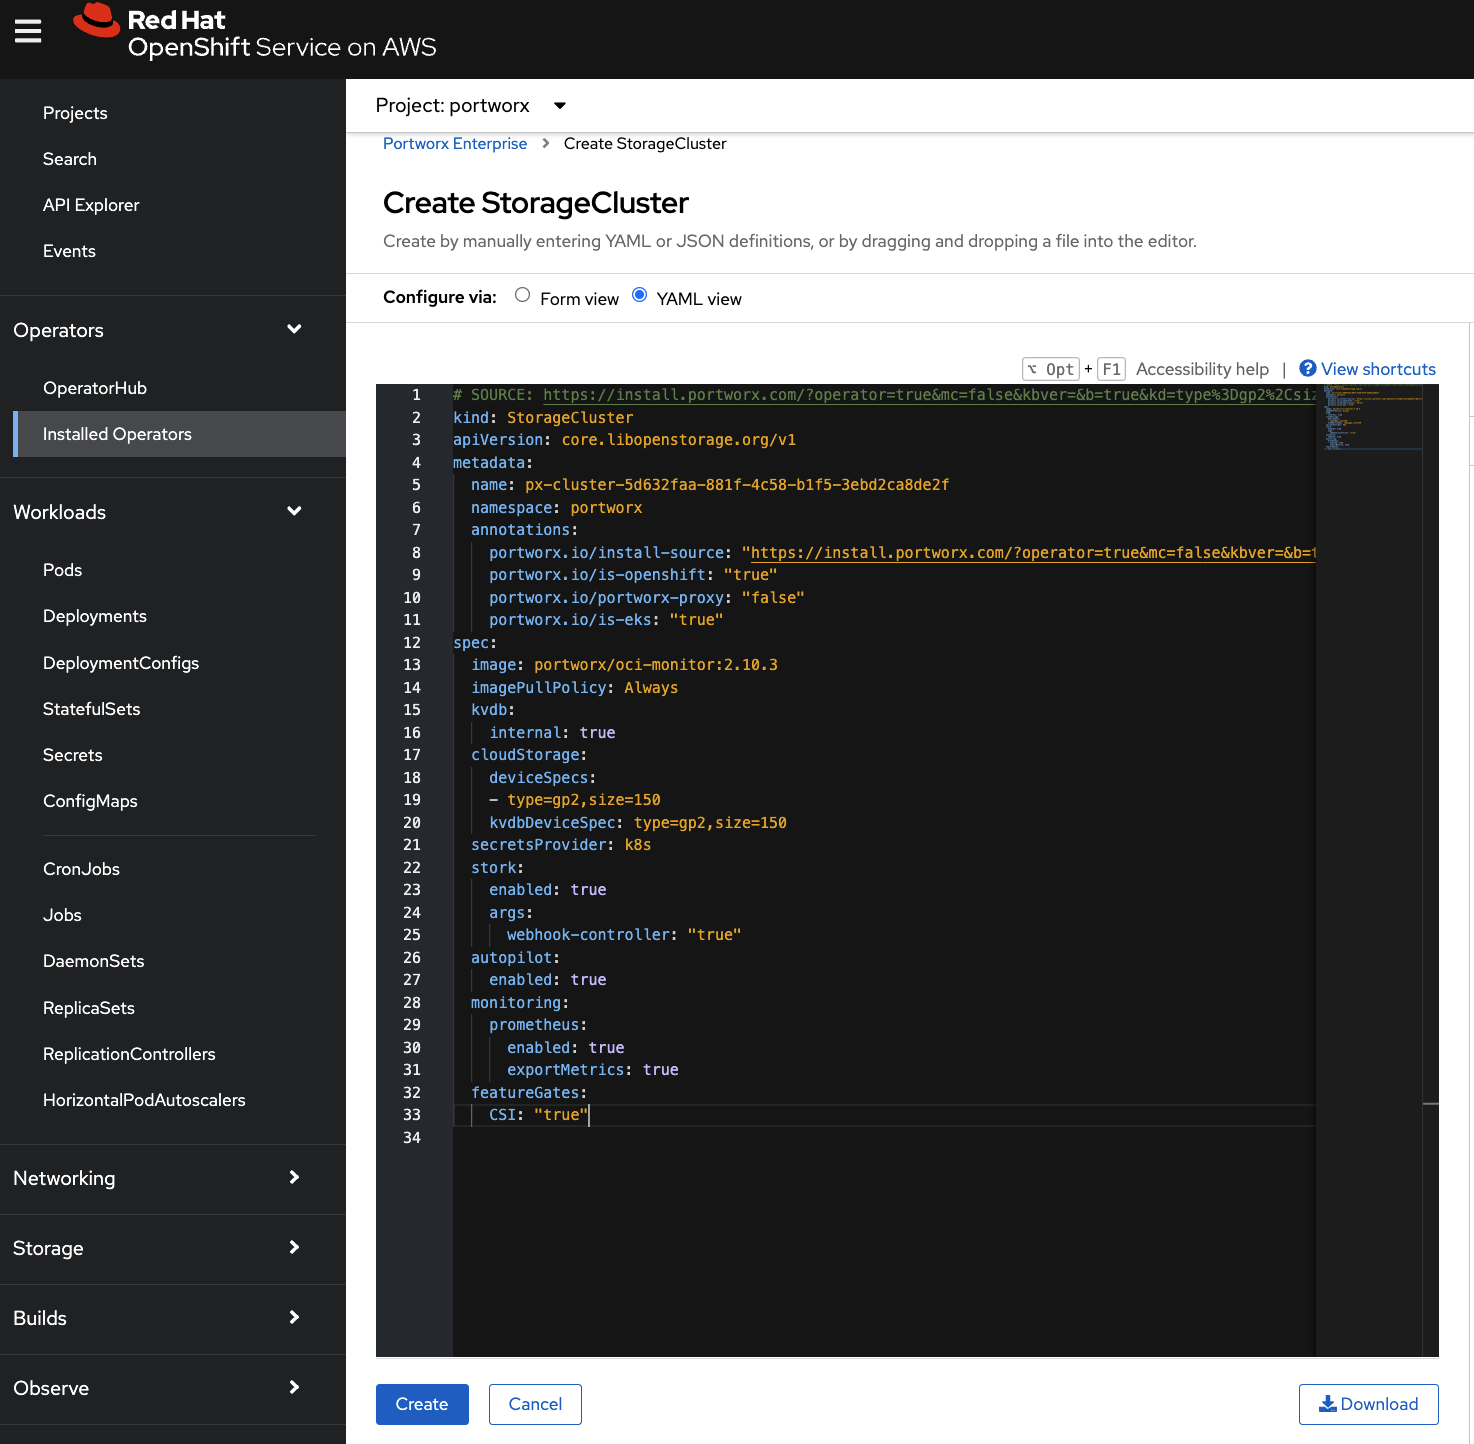
On the Create StorageCluster page, choose YAML view to configure a StorageCluster.
Copy and paste the above Portworx spec into the text-editor, and click Create to deploy Portworx:
Verify that Portworx has deployed successfully by navigating to the Storage Cluster tab of the Installed Operators page. Once Portworx has been fully deployed, the status will show as Online:

Refresh your browser to see the Portworx option in the left pane. Click the Cluster sub-tab to access the Portworx dashboard.
Verify your Portworx installation
Once you’ve installed Portworx, you can perform the following tasks to verify that Portworx has installed correctly.
Verify Portworx cluster status
Once you have created the StorageCluster, you can see the Portworx option in the left pane of the OpenShift UI. Click the Cluster sub-tab to view the Portworx dashboard.
If Portworx has been installed correctly, the status will be displayed as Running. You can also see the information about the status of Telemetry, Monitoring, and the version of Portworx and its components installed in your cluster.
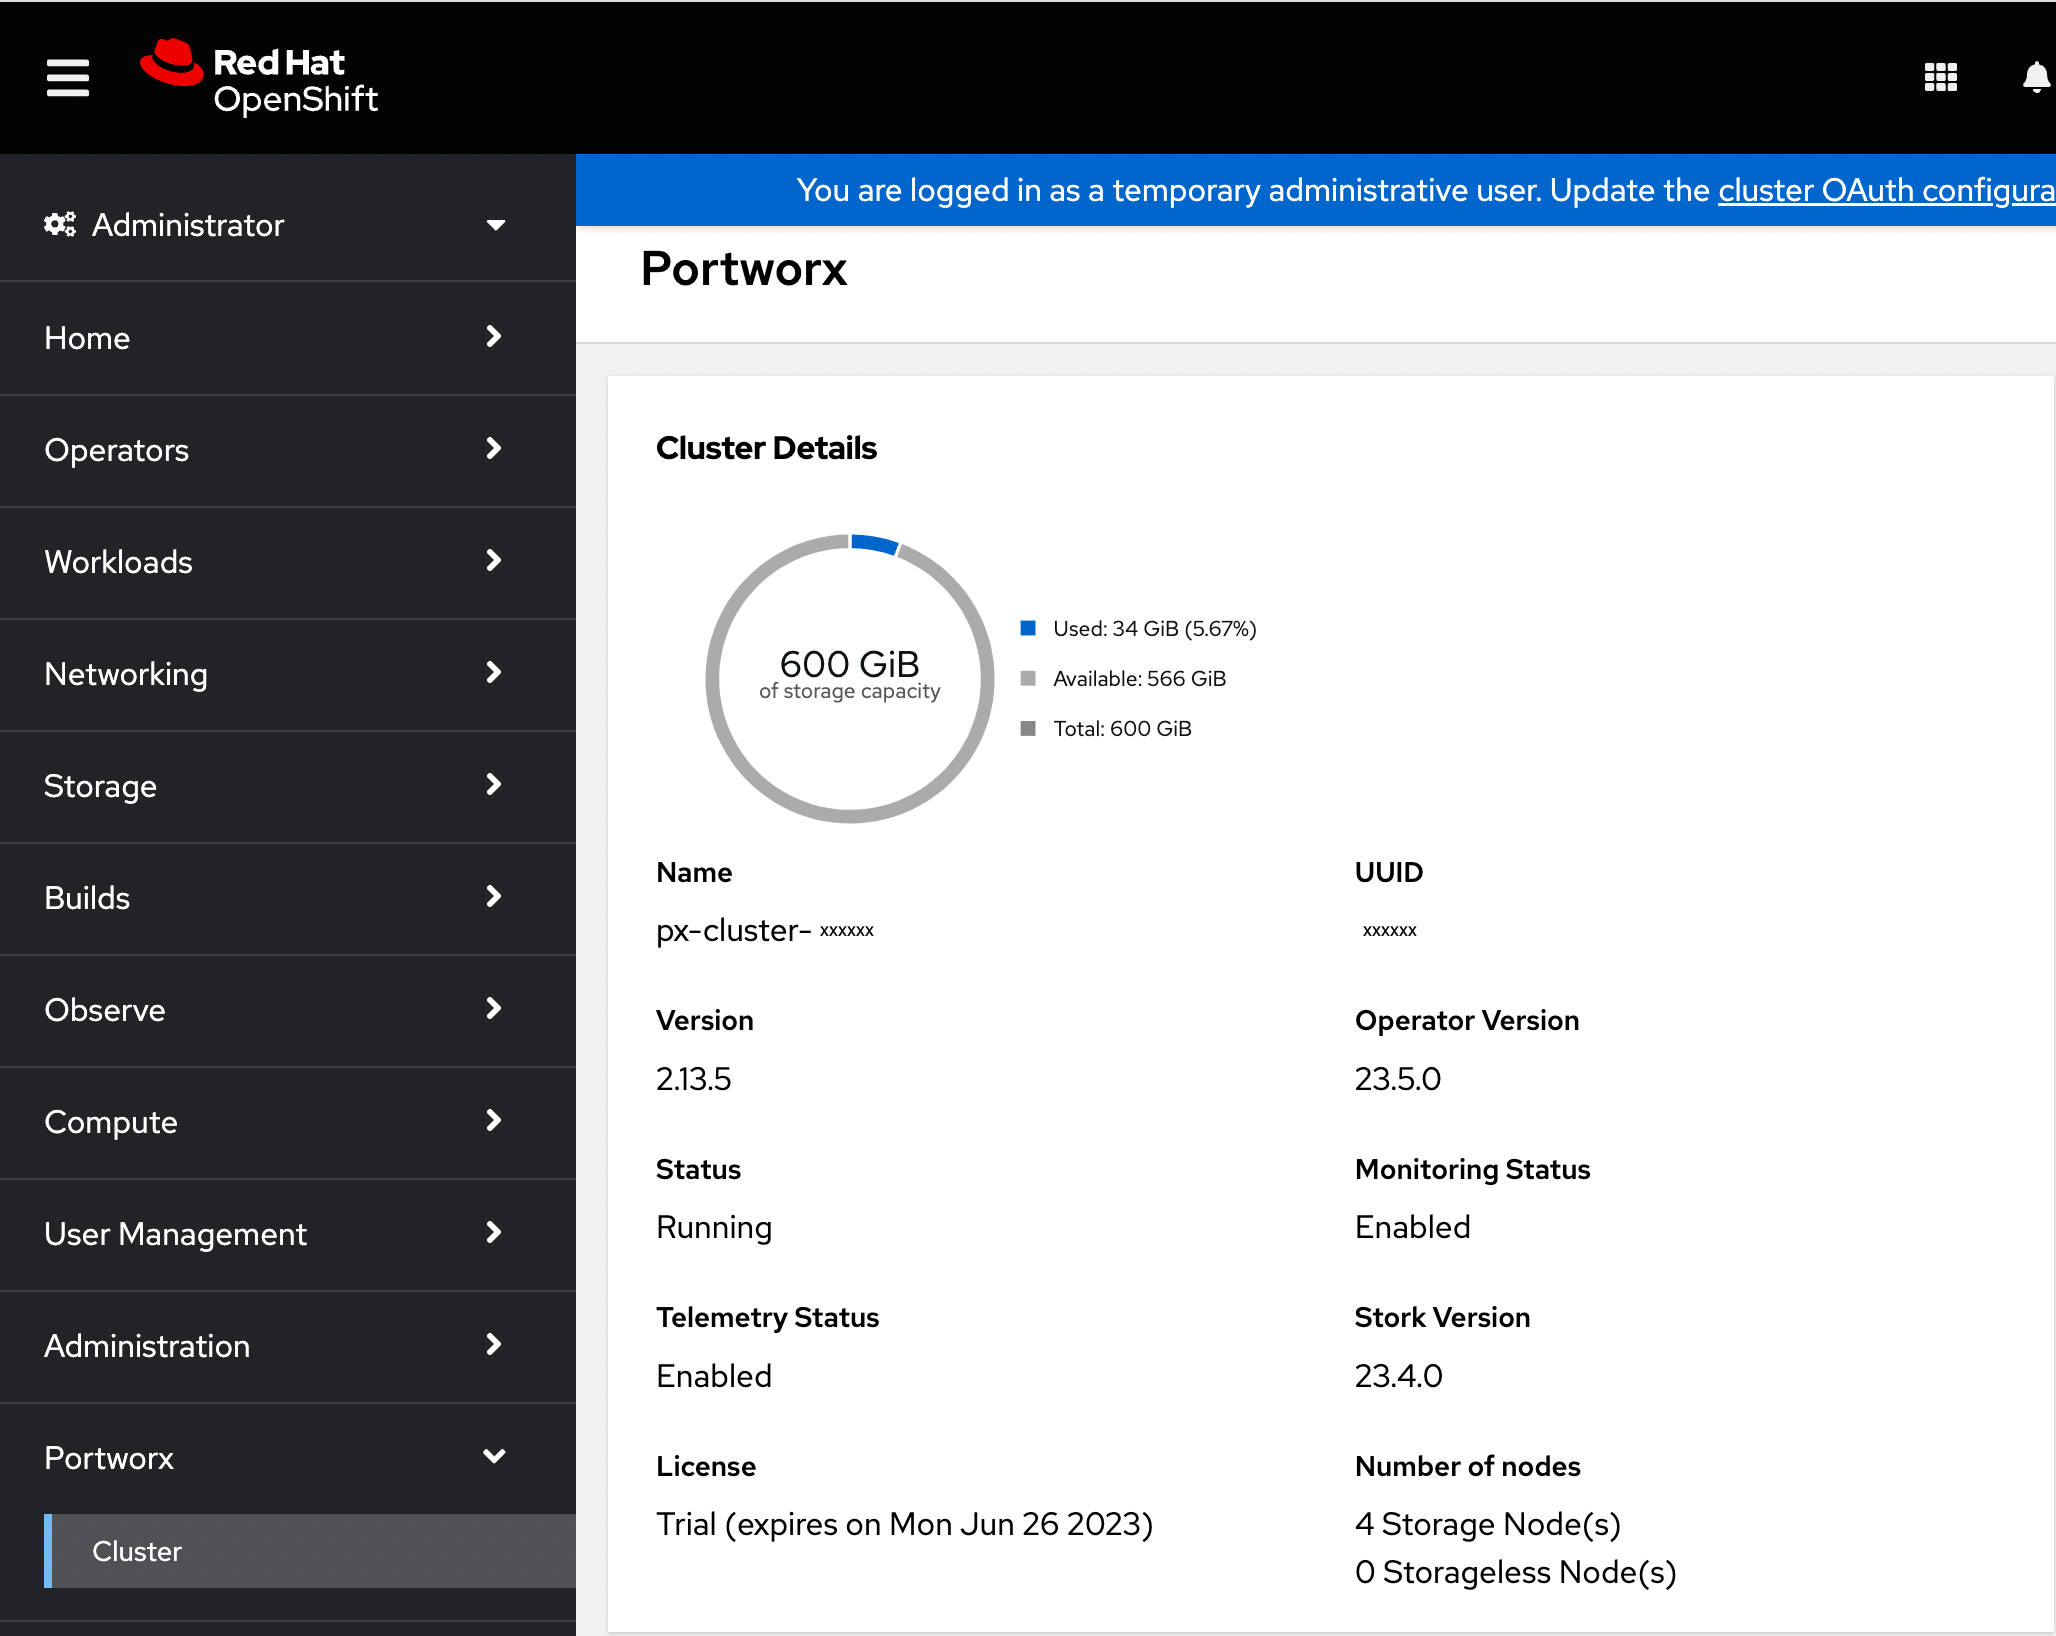
Navigate to the Node Summary section. If your cluster is running as intended, the status of all Portworx nodes should be Online.
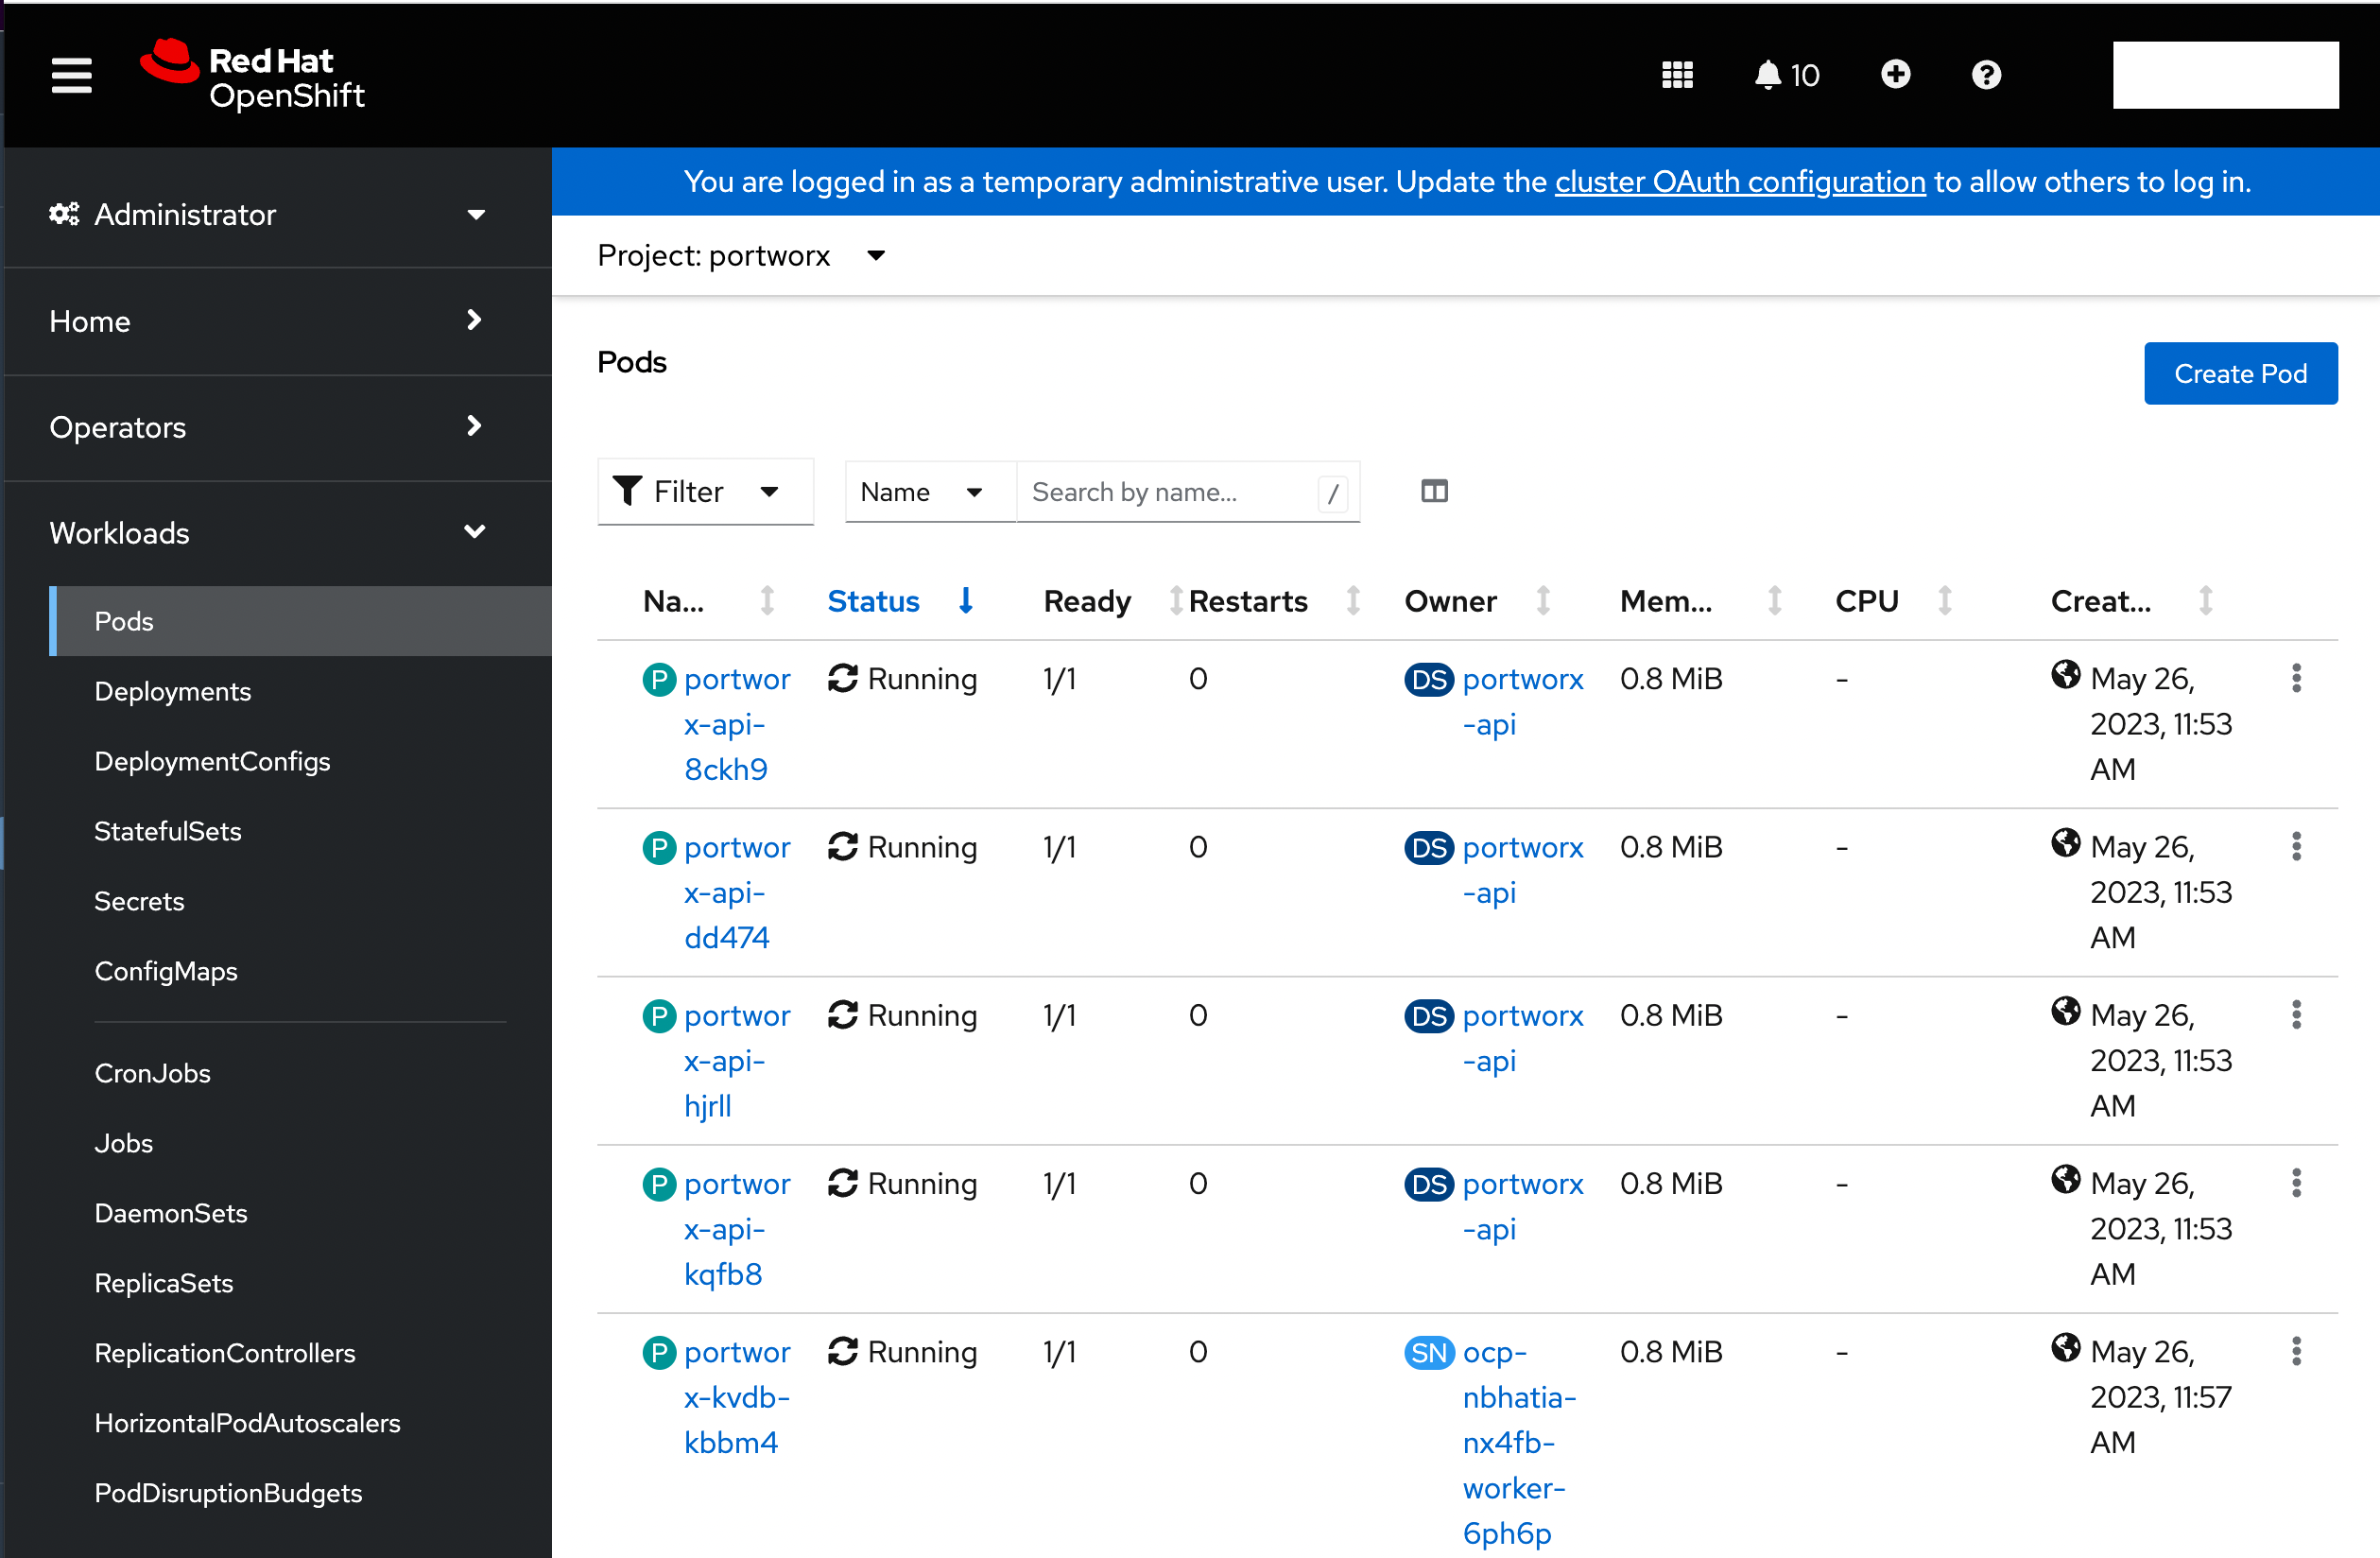
Verify if all pods are running
From the left pane of the OpenShift UI, click Pods under the Workload option. To check the status of all pods in the portworx namespace, select portworx from the Project drop-down. If Portworx is installed correctly, then all pods should be in the Running status:
Create your first PVC
For your apps to use persistent volumes powered by Portworx, you must use a StorageClass that references Portworx as the provisioner. Portworx includes a number of default StorageClasses, which you can reference with PersistentVolumeClaims (PVCs) you create. For a more general overview of how storage works within Kubernetes, refer to the Persistent Volumes section of the Kubernetes documentation.
Perform the following steps to create a PVC:
Paste the following in the text-editor to create a PVC referencing the
px-csi-dbdefault StorageClass and click Create:kind: PersistentVolumeClaim apiVersion: v1 metadata: name: px-check-pvc spec: storageClassName: px-csi-db accessModes: - ReadWriteOnce resources: requests: storage: 2GiRun the
oc applycommand to create a PVC:oc apply -f <your-pvc-name>.yamlpersistentvolumeclaim/example-pvc created
Verify your StorageClass and PVC
- Navigate to the Portworx dashboard by clicking Cluster under the Portworx option in the left pane.
Scroll to the Volumes section under Cluster details to view the status of your PVCs:

The
Upstatus indicates that the PVC is successfully bound to a Persistent Volume and is available for use.